
Get Started Now
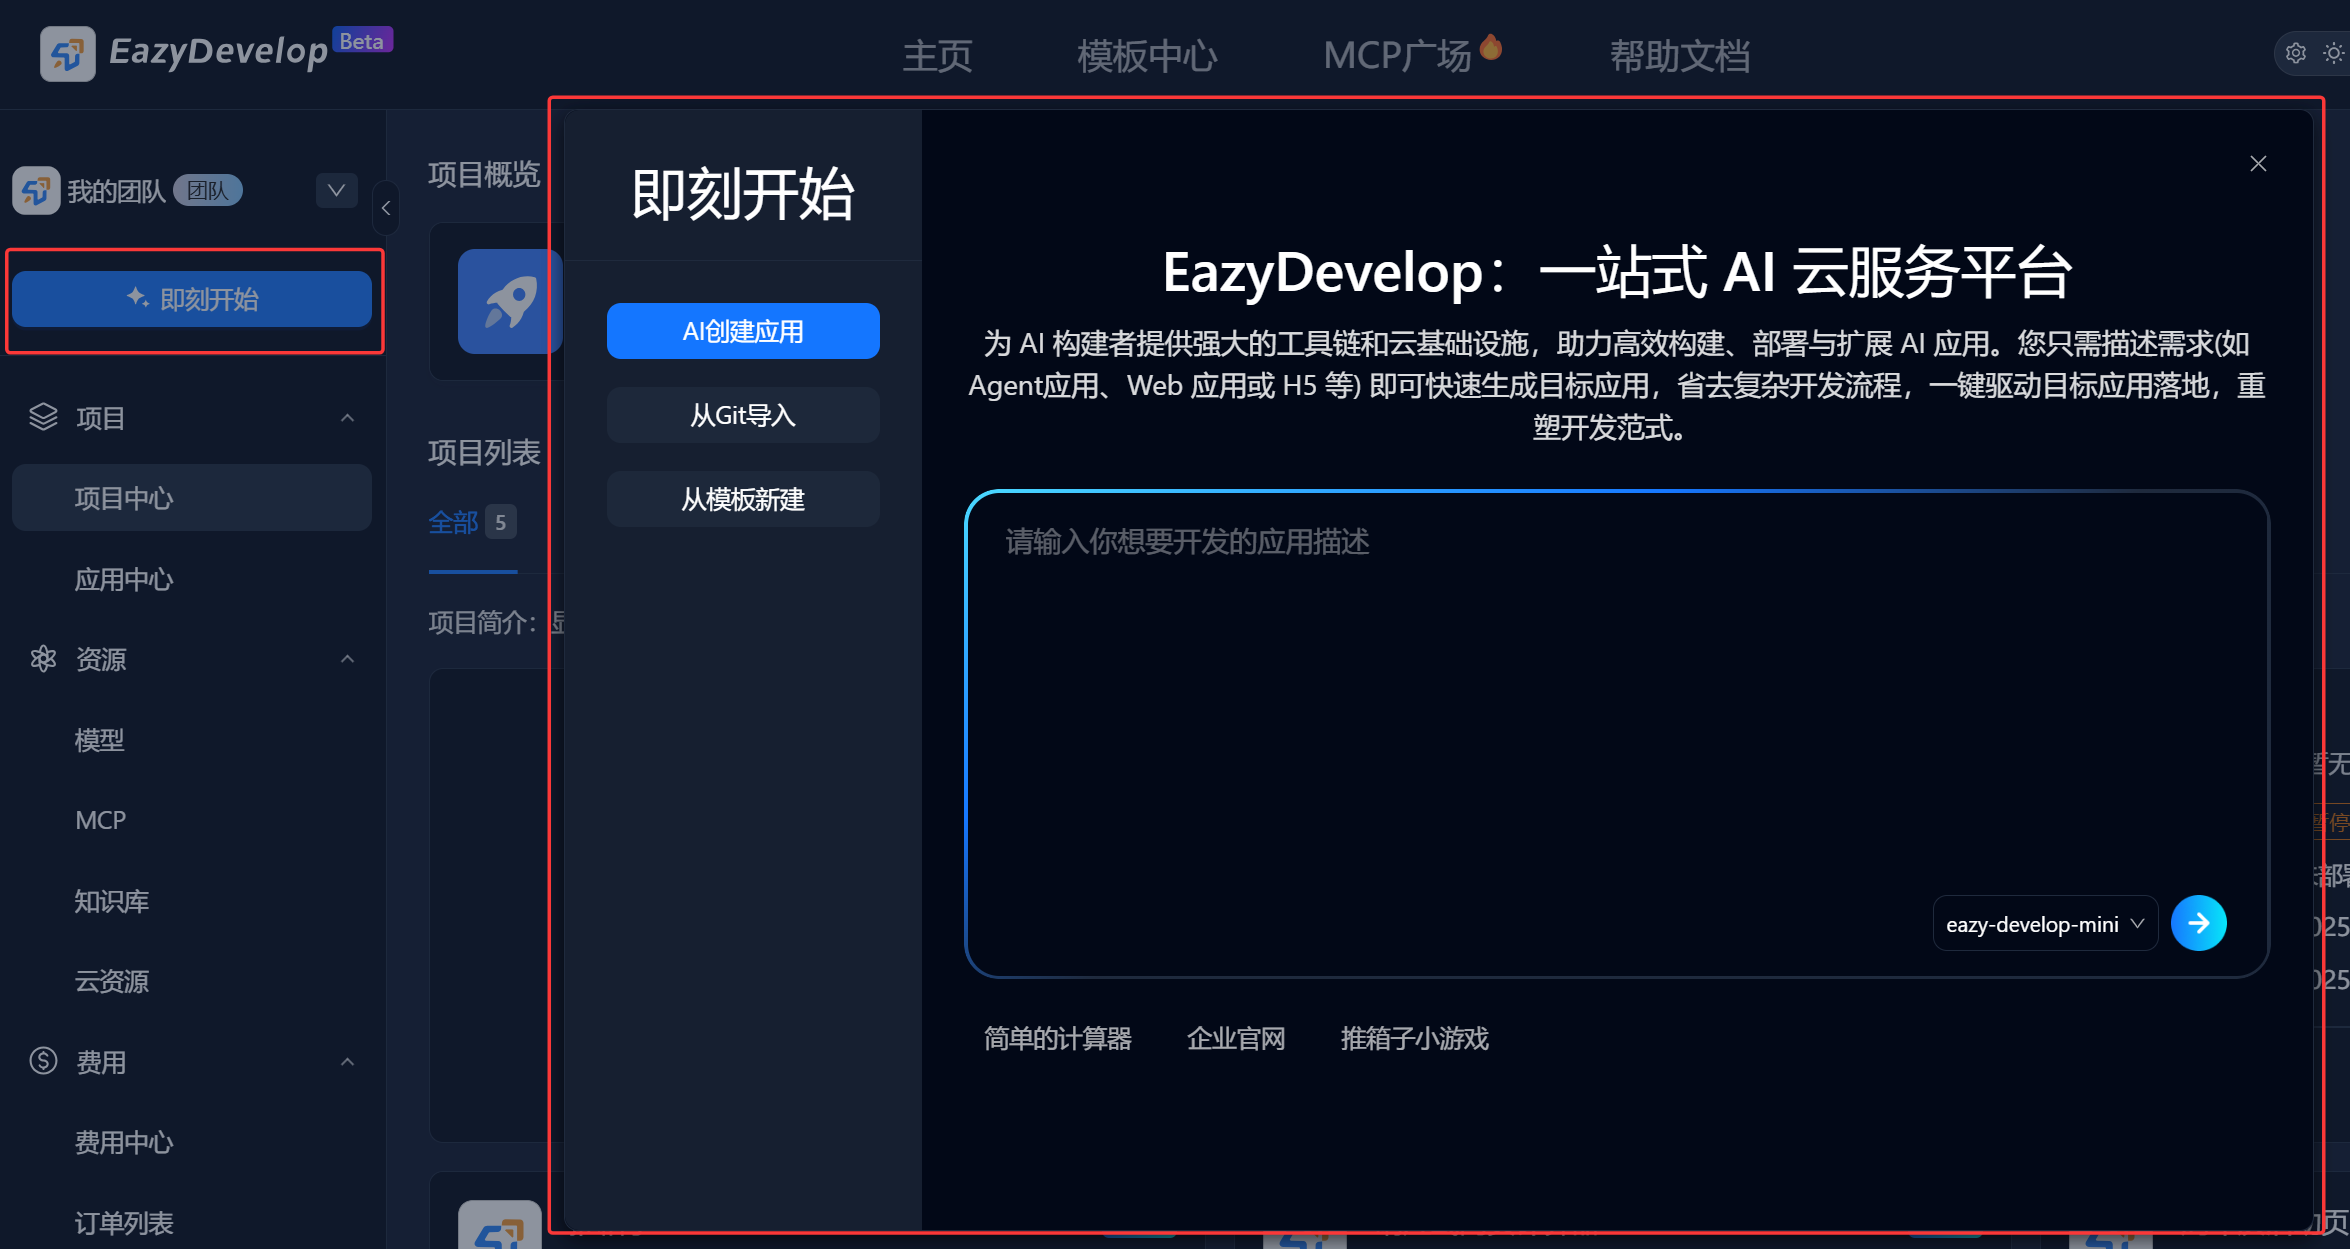
EazyDevelop's core functionality starts with the [Get Started Now] button. On any page of the console, click the [Get Started Now] button in the left menu to open the dialog. The system provides three ways to create applications: AI App Creation, Git Import, and Template Creation.
AI App Creation
AI App Creation transforms one-sentence requirements into applications that can run directly on the EazyDevelop platform through AI capabilities.
Follow these steps to easily create your application:
Enter the target page scenario (such as "online form" or "product display page");
Describe the overall page framework (such as "top navigation bar + middle content area + bottom button");
Provide clear and detailed requirement prompts;
Break down complex requirements, avoid long text input, and reduce model understanding bias;
Send instructions and wait for generation results.
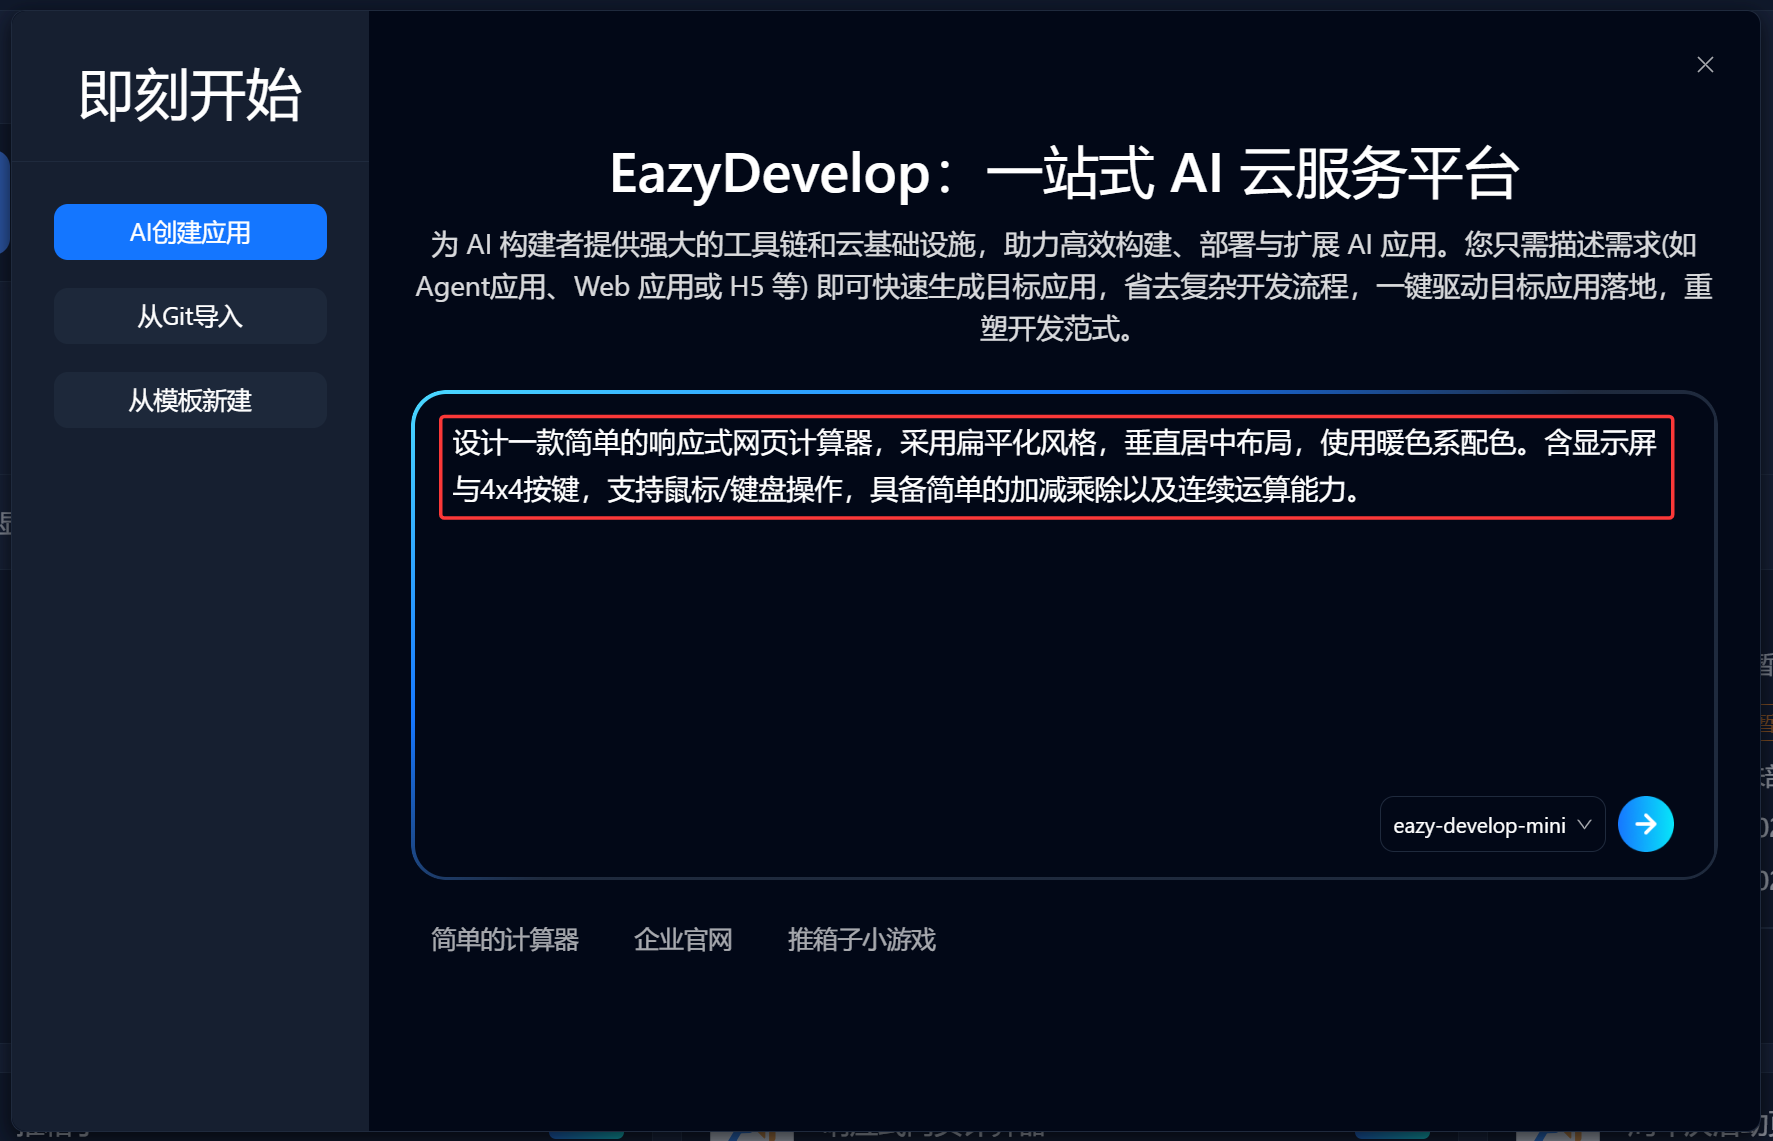
For example, enter: Design a simple responsive web calculator with a flat style, vertically centered layout, and warm color scheme. Include a display screen and 4x4 buttons, support mouse/keyboard operation, and have simple addition, subtraction, multiplication, division, and continuous calculation capabilities.
Click the send button, and AI will analyze the one-sentence requirement input and recommend suitable templates.
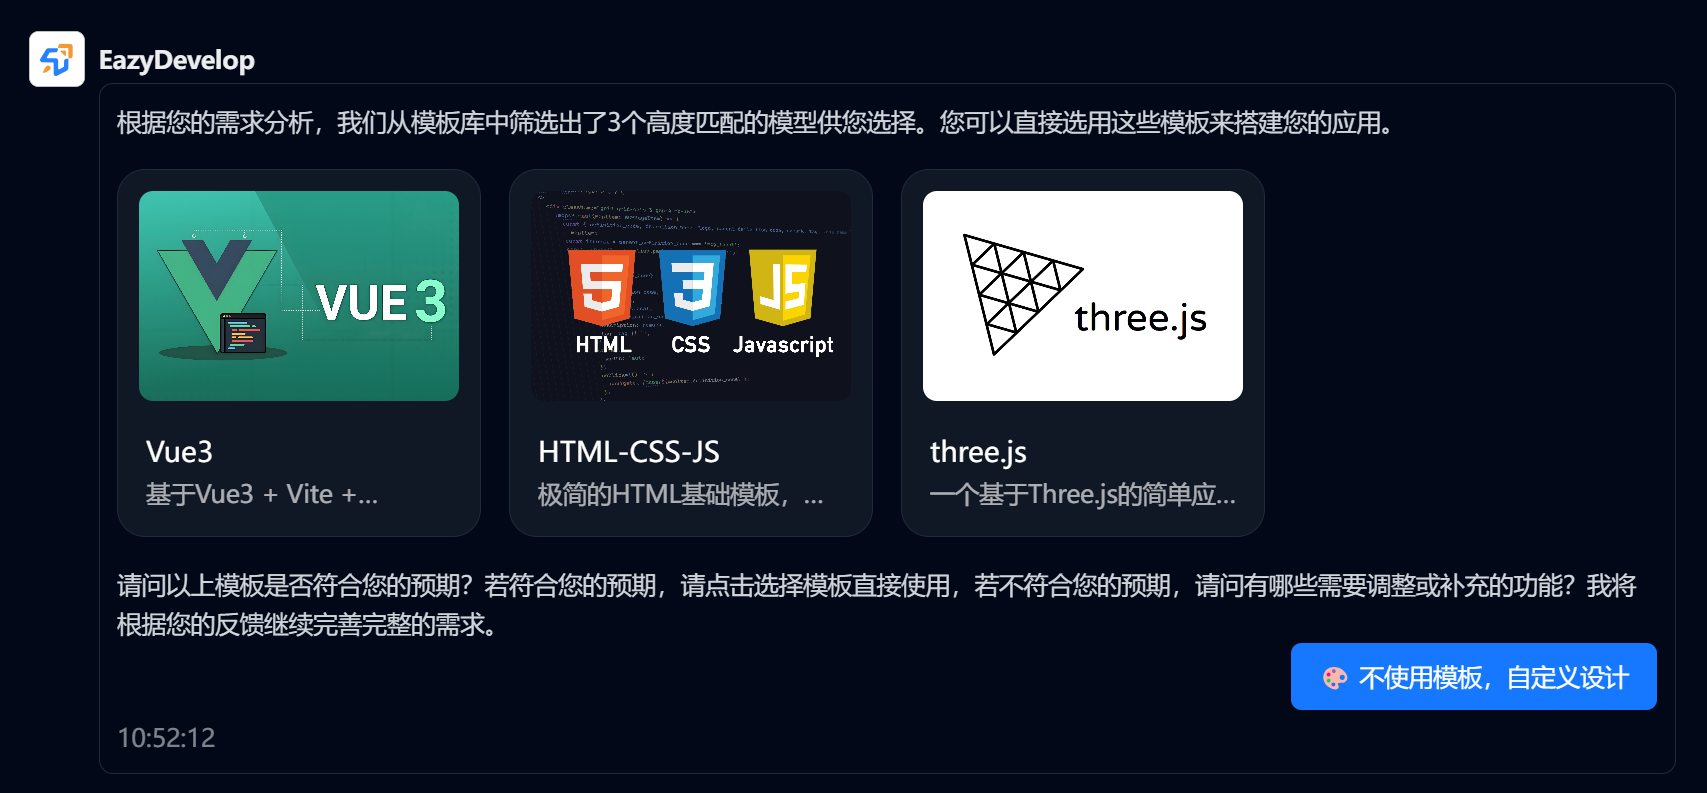
If the recommended template doesn't meet your needs, you can choose [Don't use template, custom design]. AI will generate several feature points based on the one-sentence requirement, which determine the application's functionality.
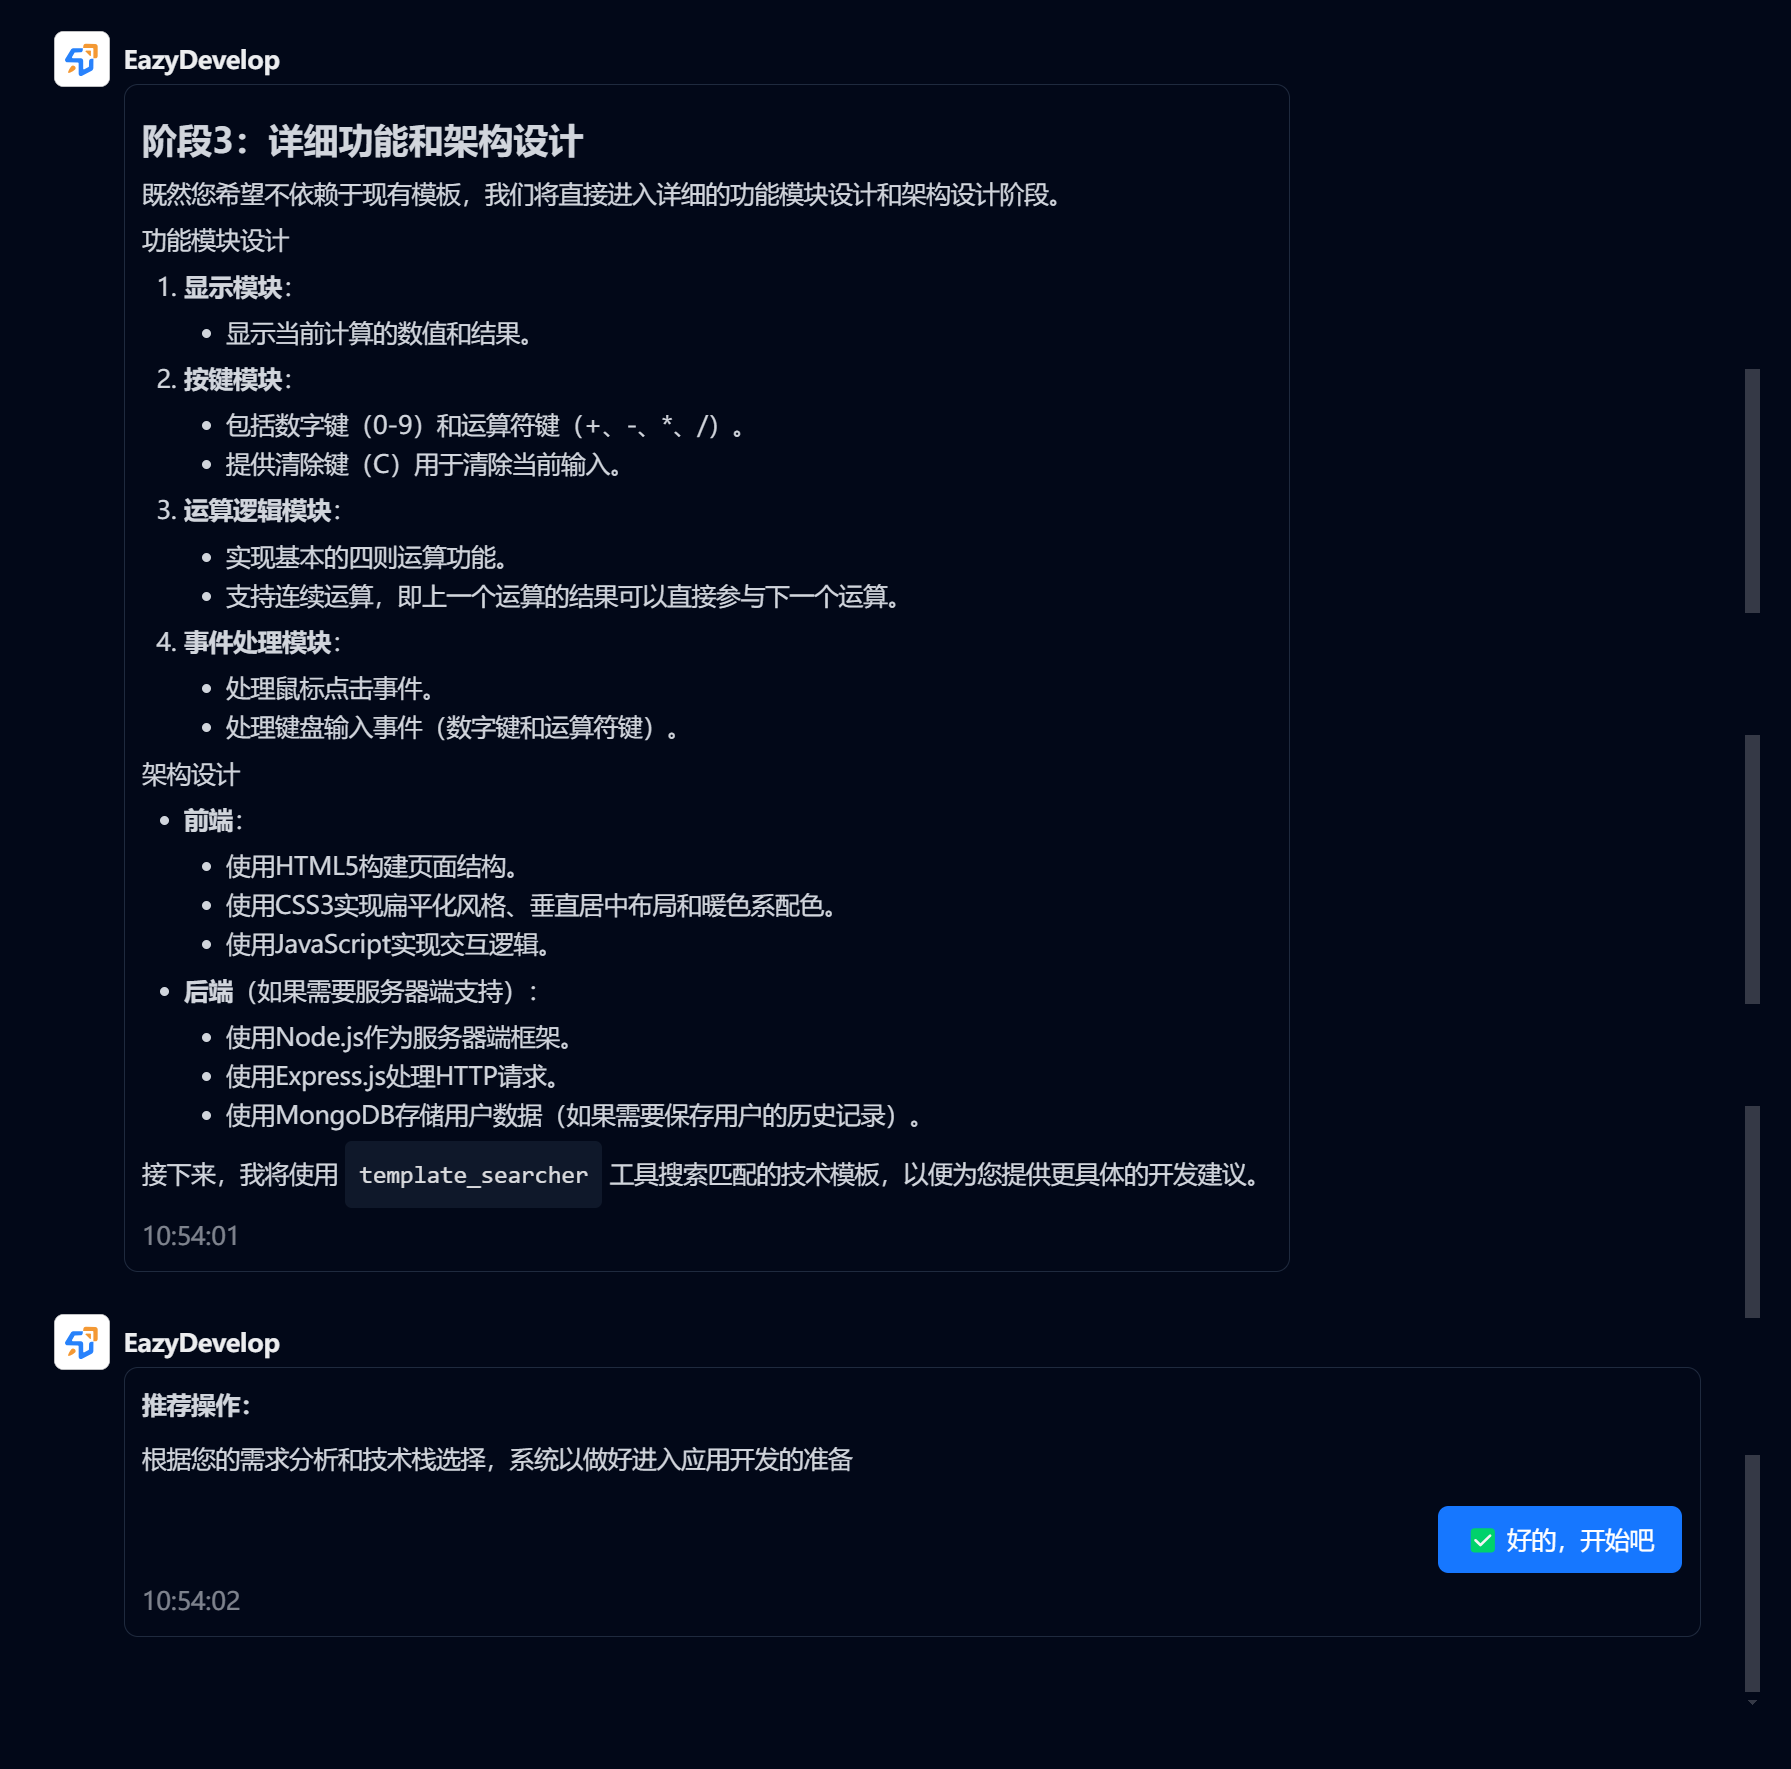 Click the [OK, let's start] button, wait a moment, and you can enter the application preview interface for subsequent operations.
Git Import
When creating a project, you can also bind your GitHub account (including organizations), then import projects from your GitHub (including private projects) for development.
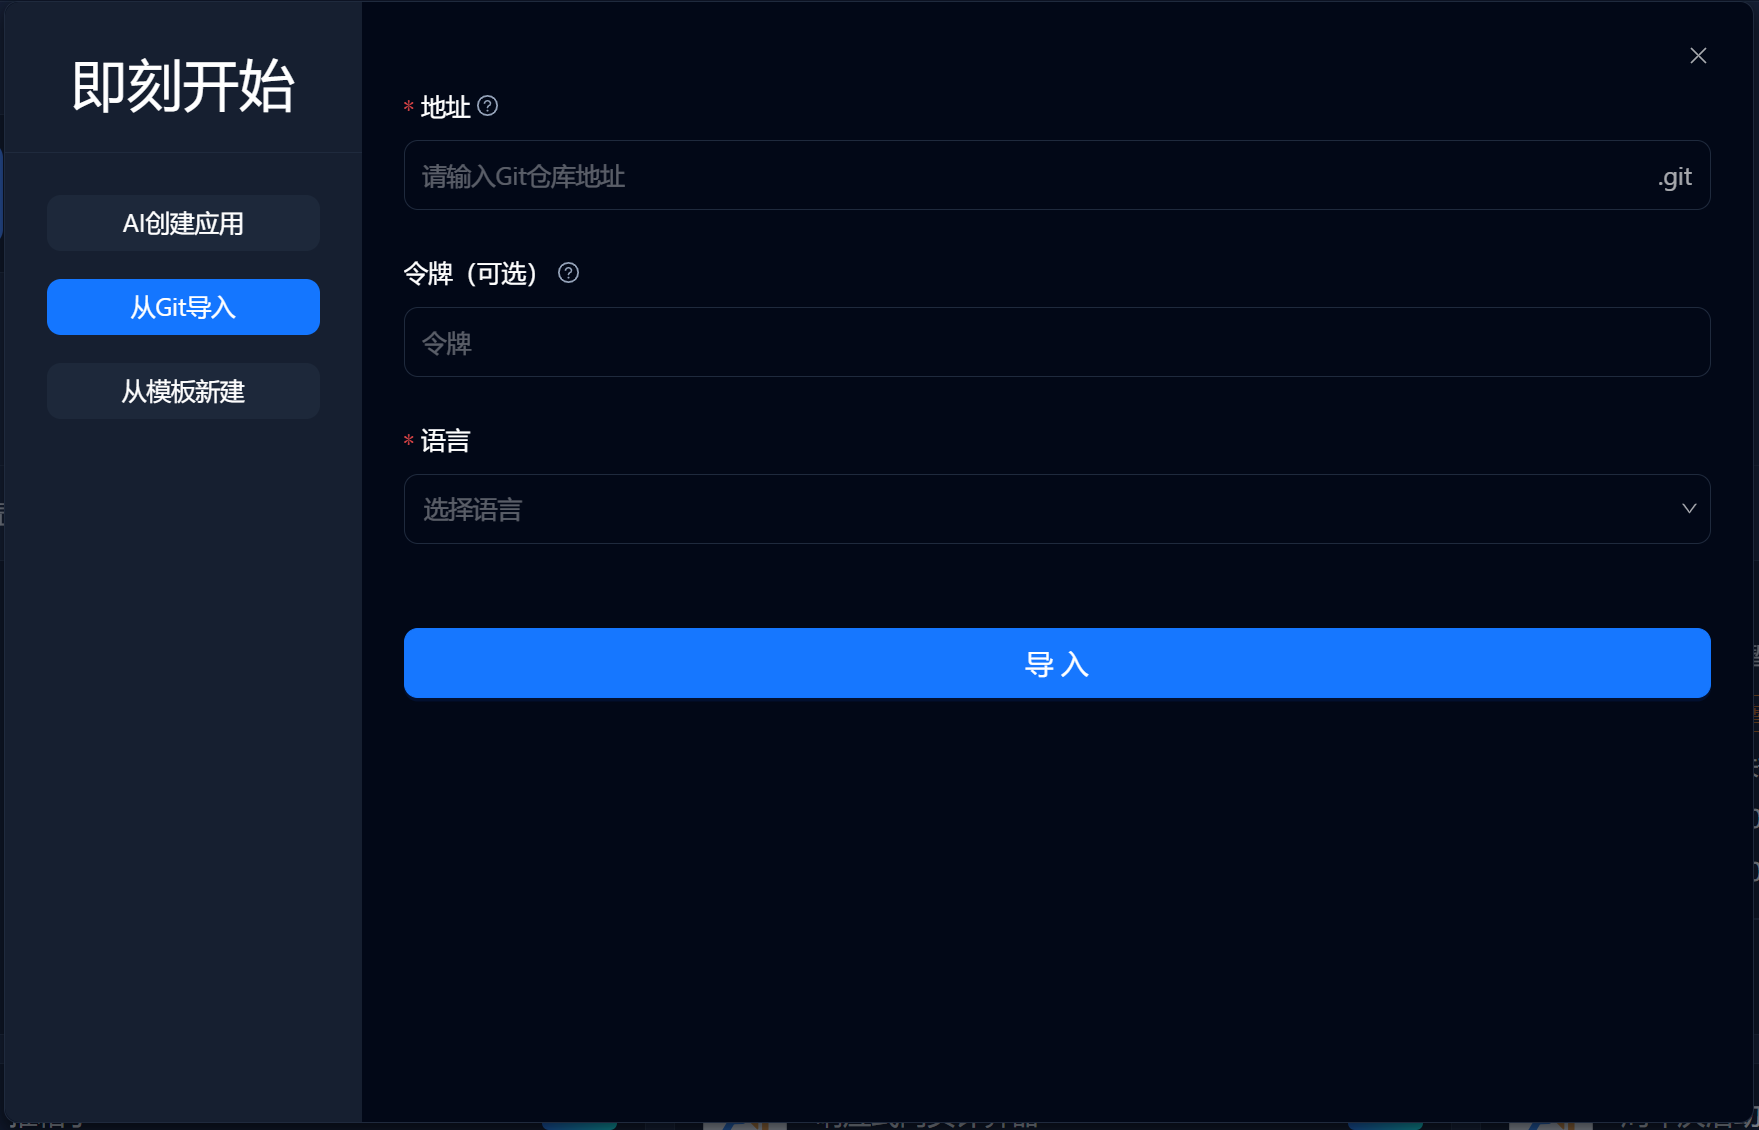
How to get a token, please refer to https://blog.csdn.net/GoodburghCottage/article/details/130341502
Template Creation
EazyDevelop's template center provides various completed project templates. Selecting project templates can save you from complex description processes and make the final result closer to the expected application. You can also choose ready-to-use application templates, which require no development, zero-code deployment, and worry-free online deployment.
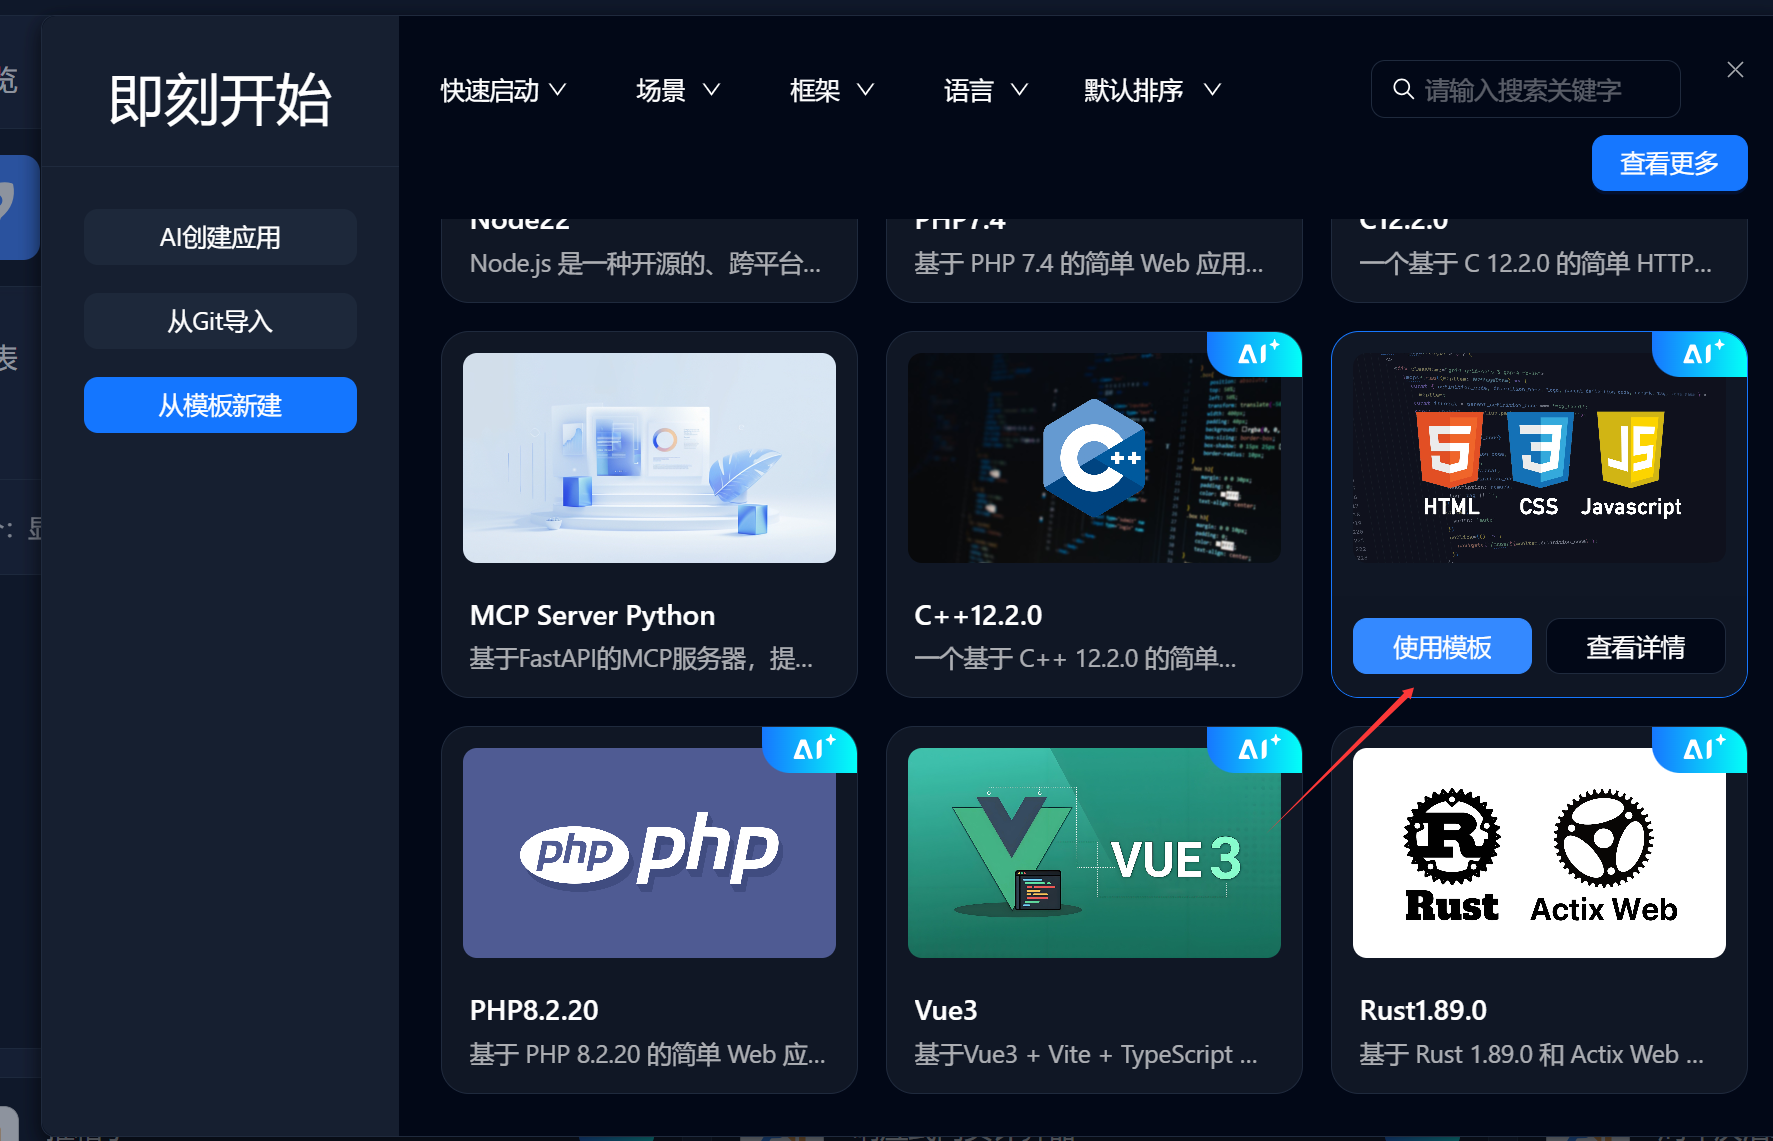
Select a template, click use, wait a moment, and you can enter the application preview interface for subsequent operations.
Workspace
On the EazyDevelop platform, there are mainly two ways to edit application content, suitable for different editing scenarios.
Lite Mode
Equipped with a dedicated CodingAgent that can understand development goals, autonomously plan tasks, and schedule corresponding tools, independently driving the development process at all stages. From natural language input to executable results, helping you efficiently complete development tasks and improve R&D efficiency.
Pro Mode
Designed for advanced users or developers, allowing viewing, editing, and debugging of generated code based on AI-generated applications, enabling more precise logic control, performance optimization, or integration with existing technology stacks, thus bridging "low-code convenience" and "professional development flexibility" to improve application maintainability and scalability.
Lite Mode
Applicable Scenarios
Simple modifications where customers want to modify details such as adjusting text, adding image links, adjusting simple styles, etc., can directly use natural language interaction with AI. The system automatically executes and directly modifies code.
Page Layout
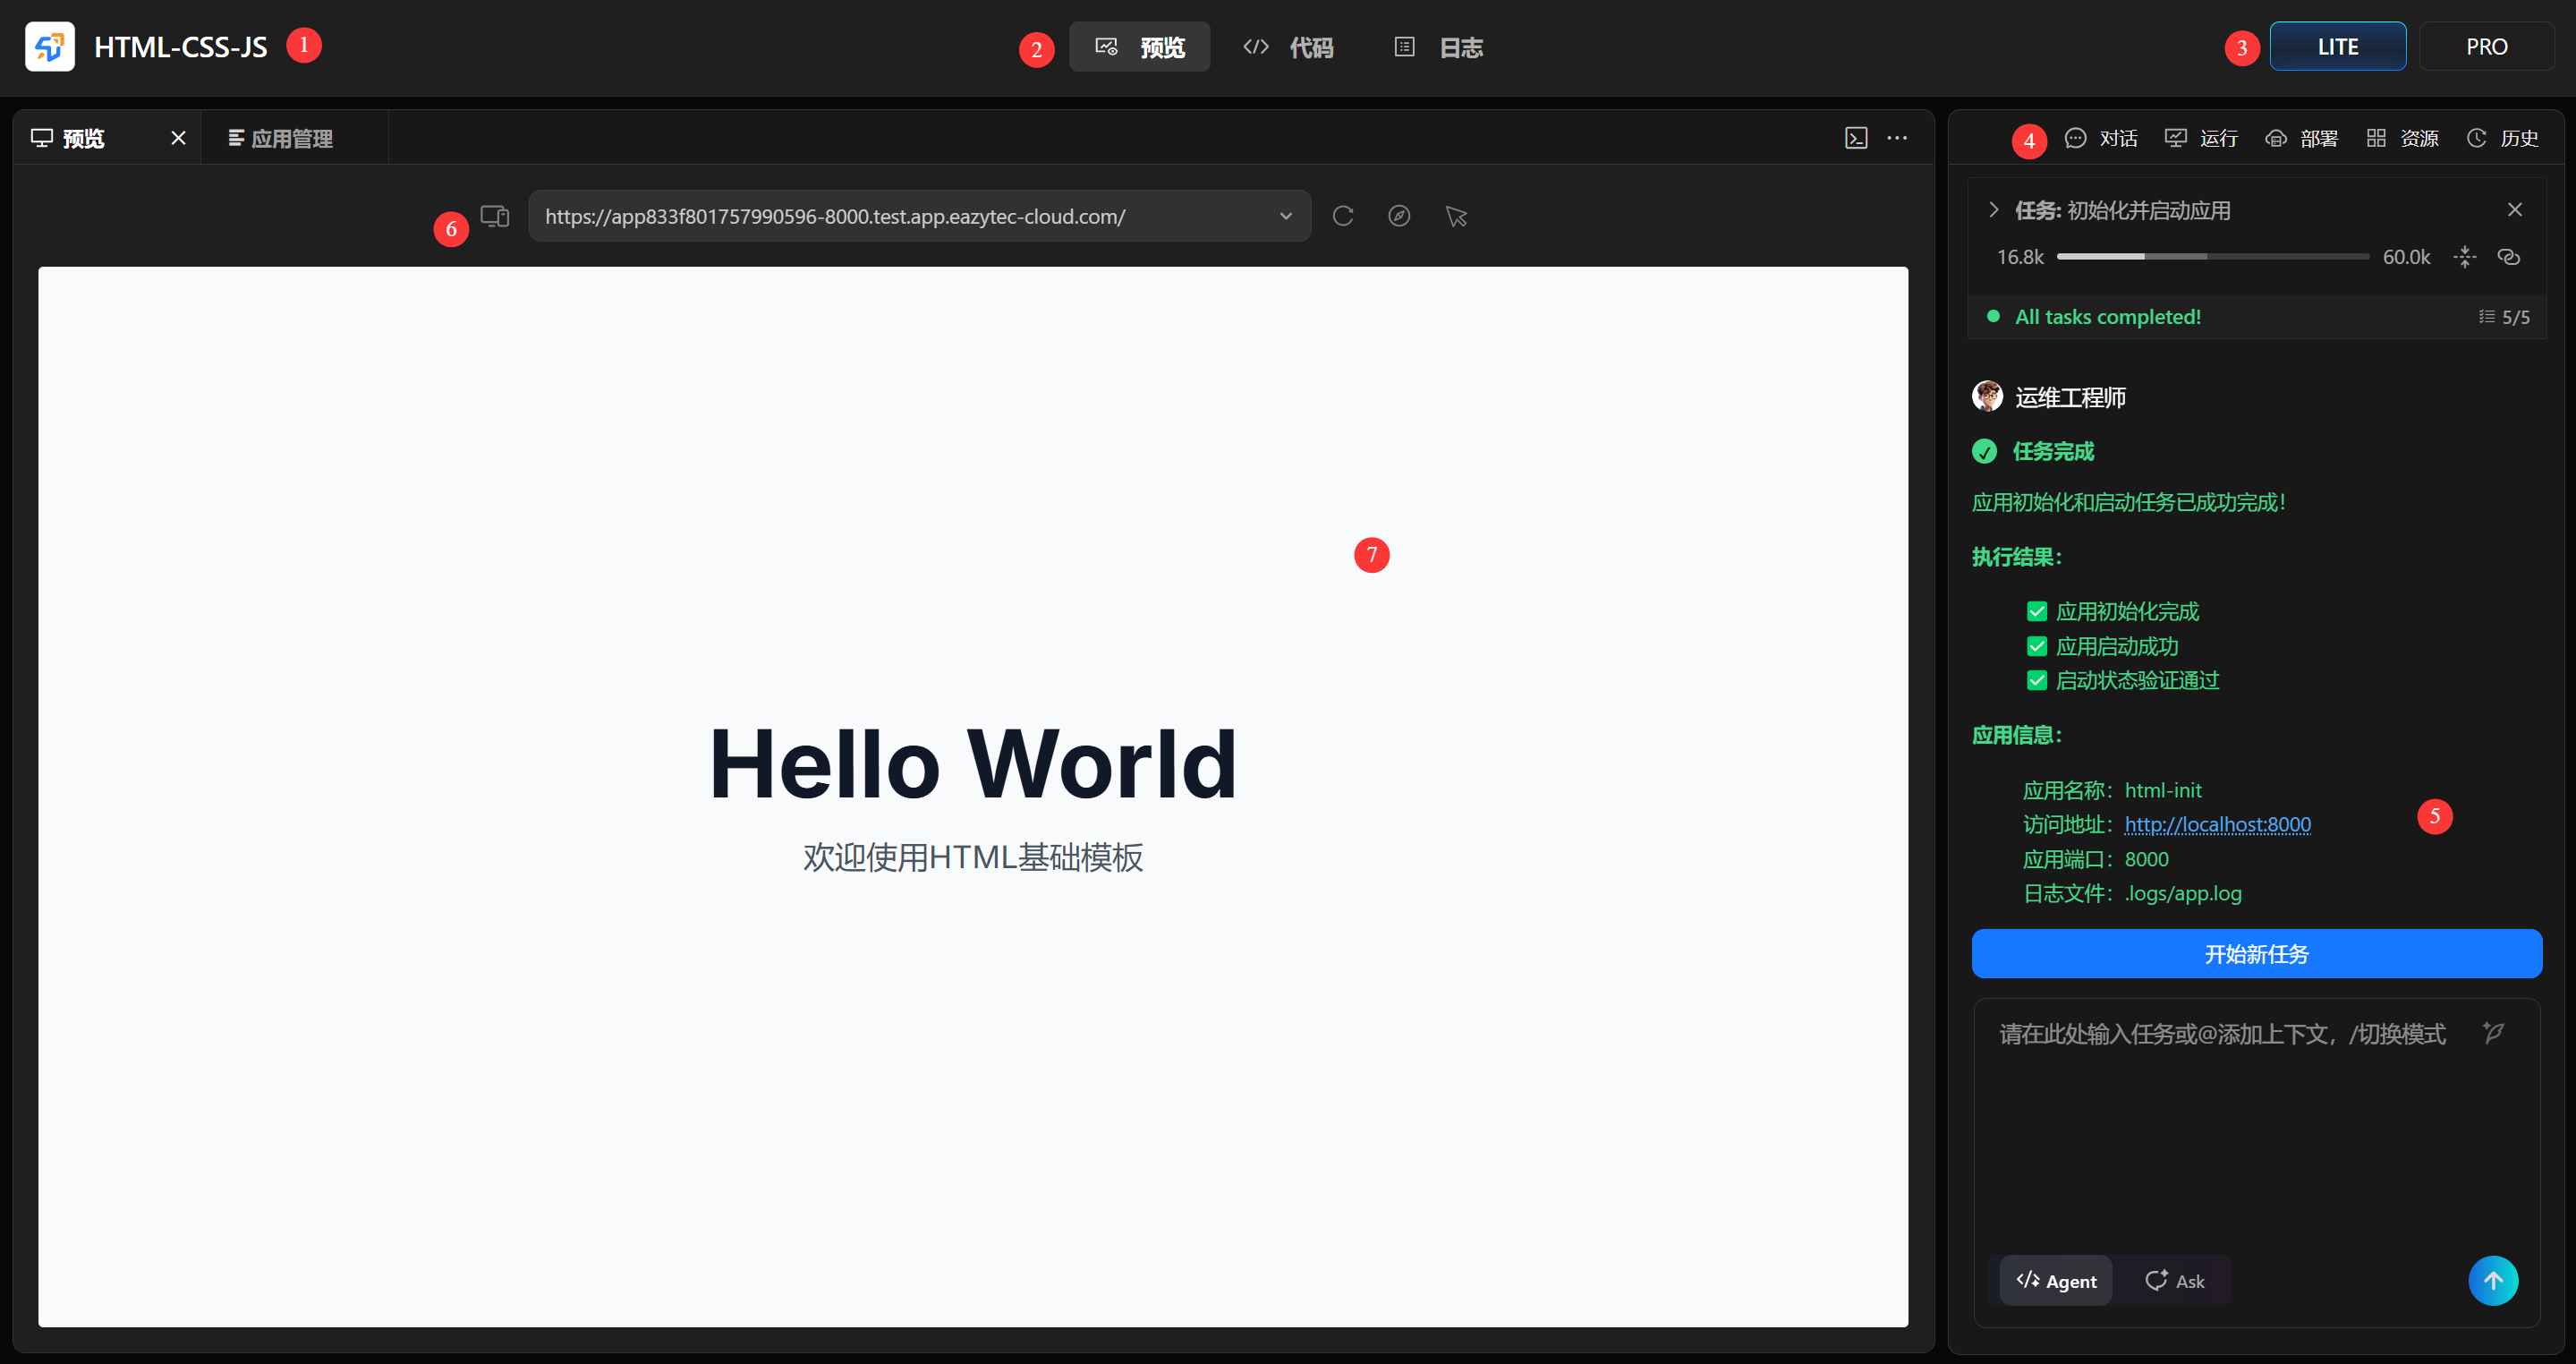
- Application Title
- Preview, Code, Log: Switch menu, the area below will display corresponding content. Under preview menu, shows page preview content; under code menu, shows system code; under log menu, shows application startup logs.
- Lite/Pro Mode Switch: Click to switch modes
- Chat, Run, Resources, Deploy, History: Entering workspace defaults to chat menu for AI conversation; under run menu, you can initialize or start applications; under deploy menu, you can deploy applications with one click; under history menu, you can view conversation history.
- Chat Content, Chat Input Area: Enter text here to chat with AI and modify applications.
- Preview Operation Buttons: PC preview/APP preview switch, display access address, refresh current page, open current page in browser, edit
- Preview Display Area
Usage
Direct Chat: Directly describe detailed requirements for page elements to be modified in Agent mode, and Agent will automatically find corresponding code and modify it.
Manual Selection Modification: In the left preview window, click the "Edit" button in the upper right corner of the window to switch to element selection mode. Click elements on the page to insert them into the sidebar Agent chat as context. Then in Agent mode, describe detailed requirements for page elements to be modified, and Agent will automatically find corresponding code and modify it.
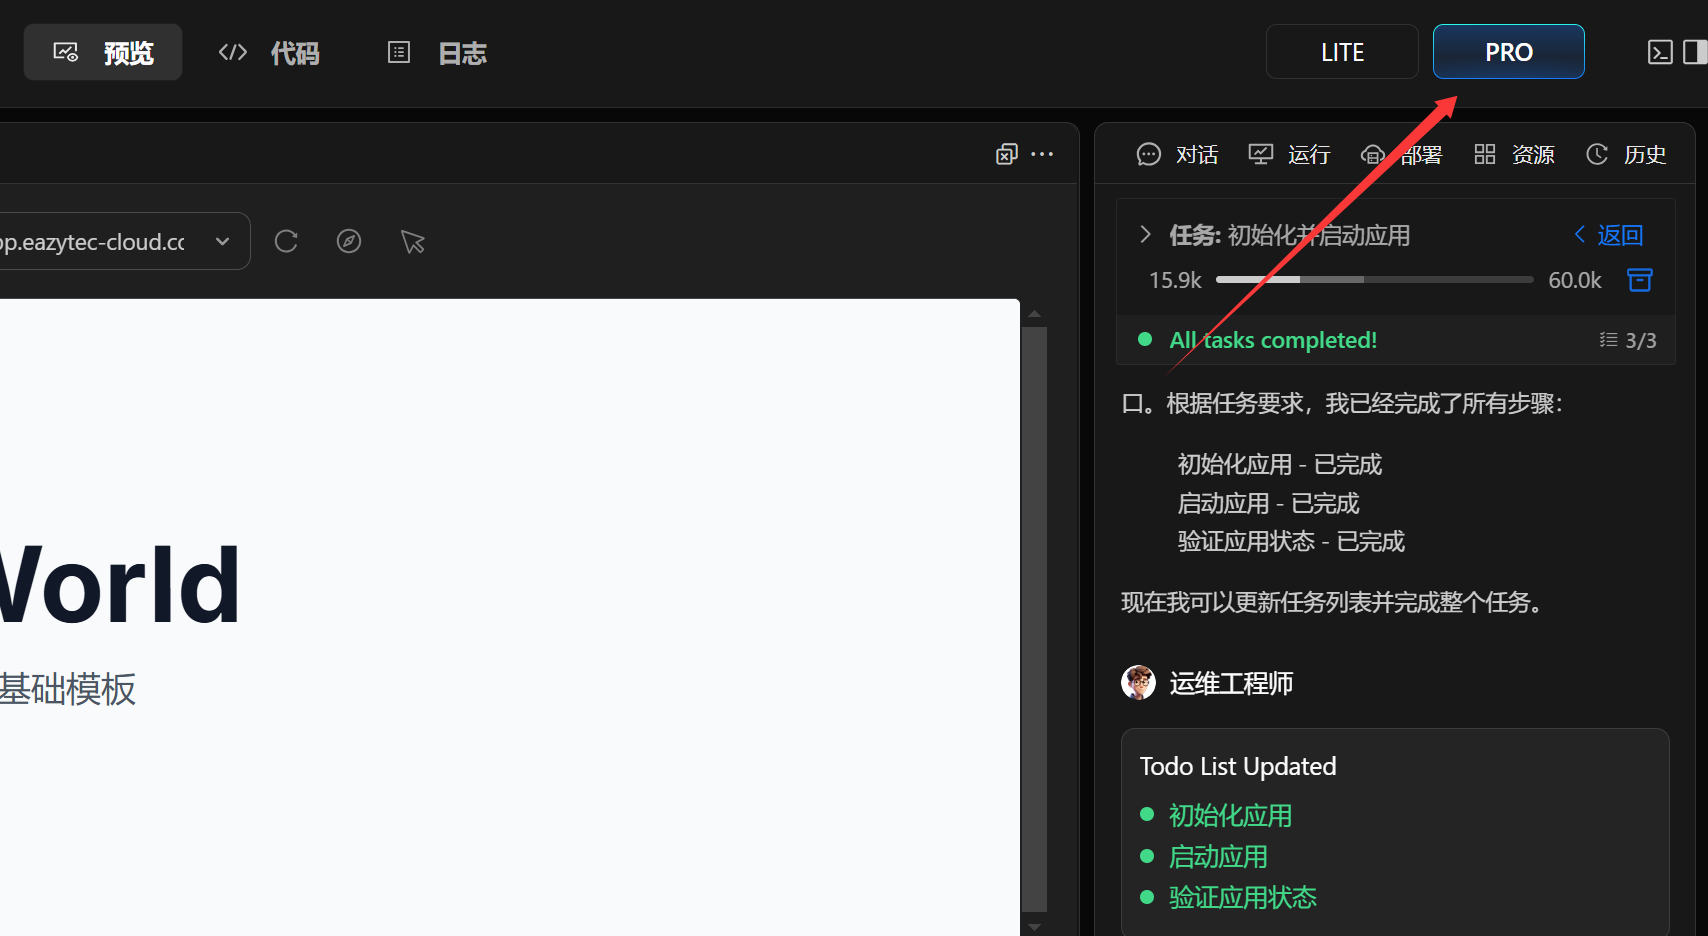
Pro Mode
Switch Method
Click the [PRO] button in the upper right corner of the page to switch to Pro mode.
Applicable Scenarios
- When customers repeatedly communicate with the model through natural language interaction but the implementation effects are not ideal, or when the model cannot fix problems itself, you can switch to Pro mode for further adjustments using the three built-in modes.
- Professional engineers who want to view the code structure and complete code of their work, can modify code themselves and program directly; directly switch to Pro mode to use code editing functions more familiar to engineers.
Page Layout
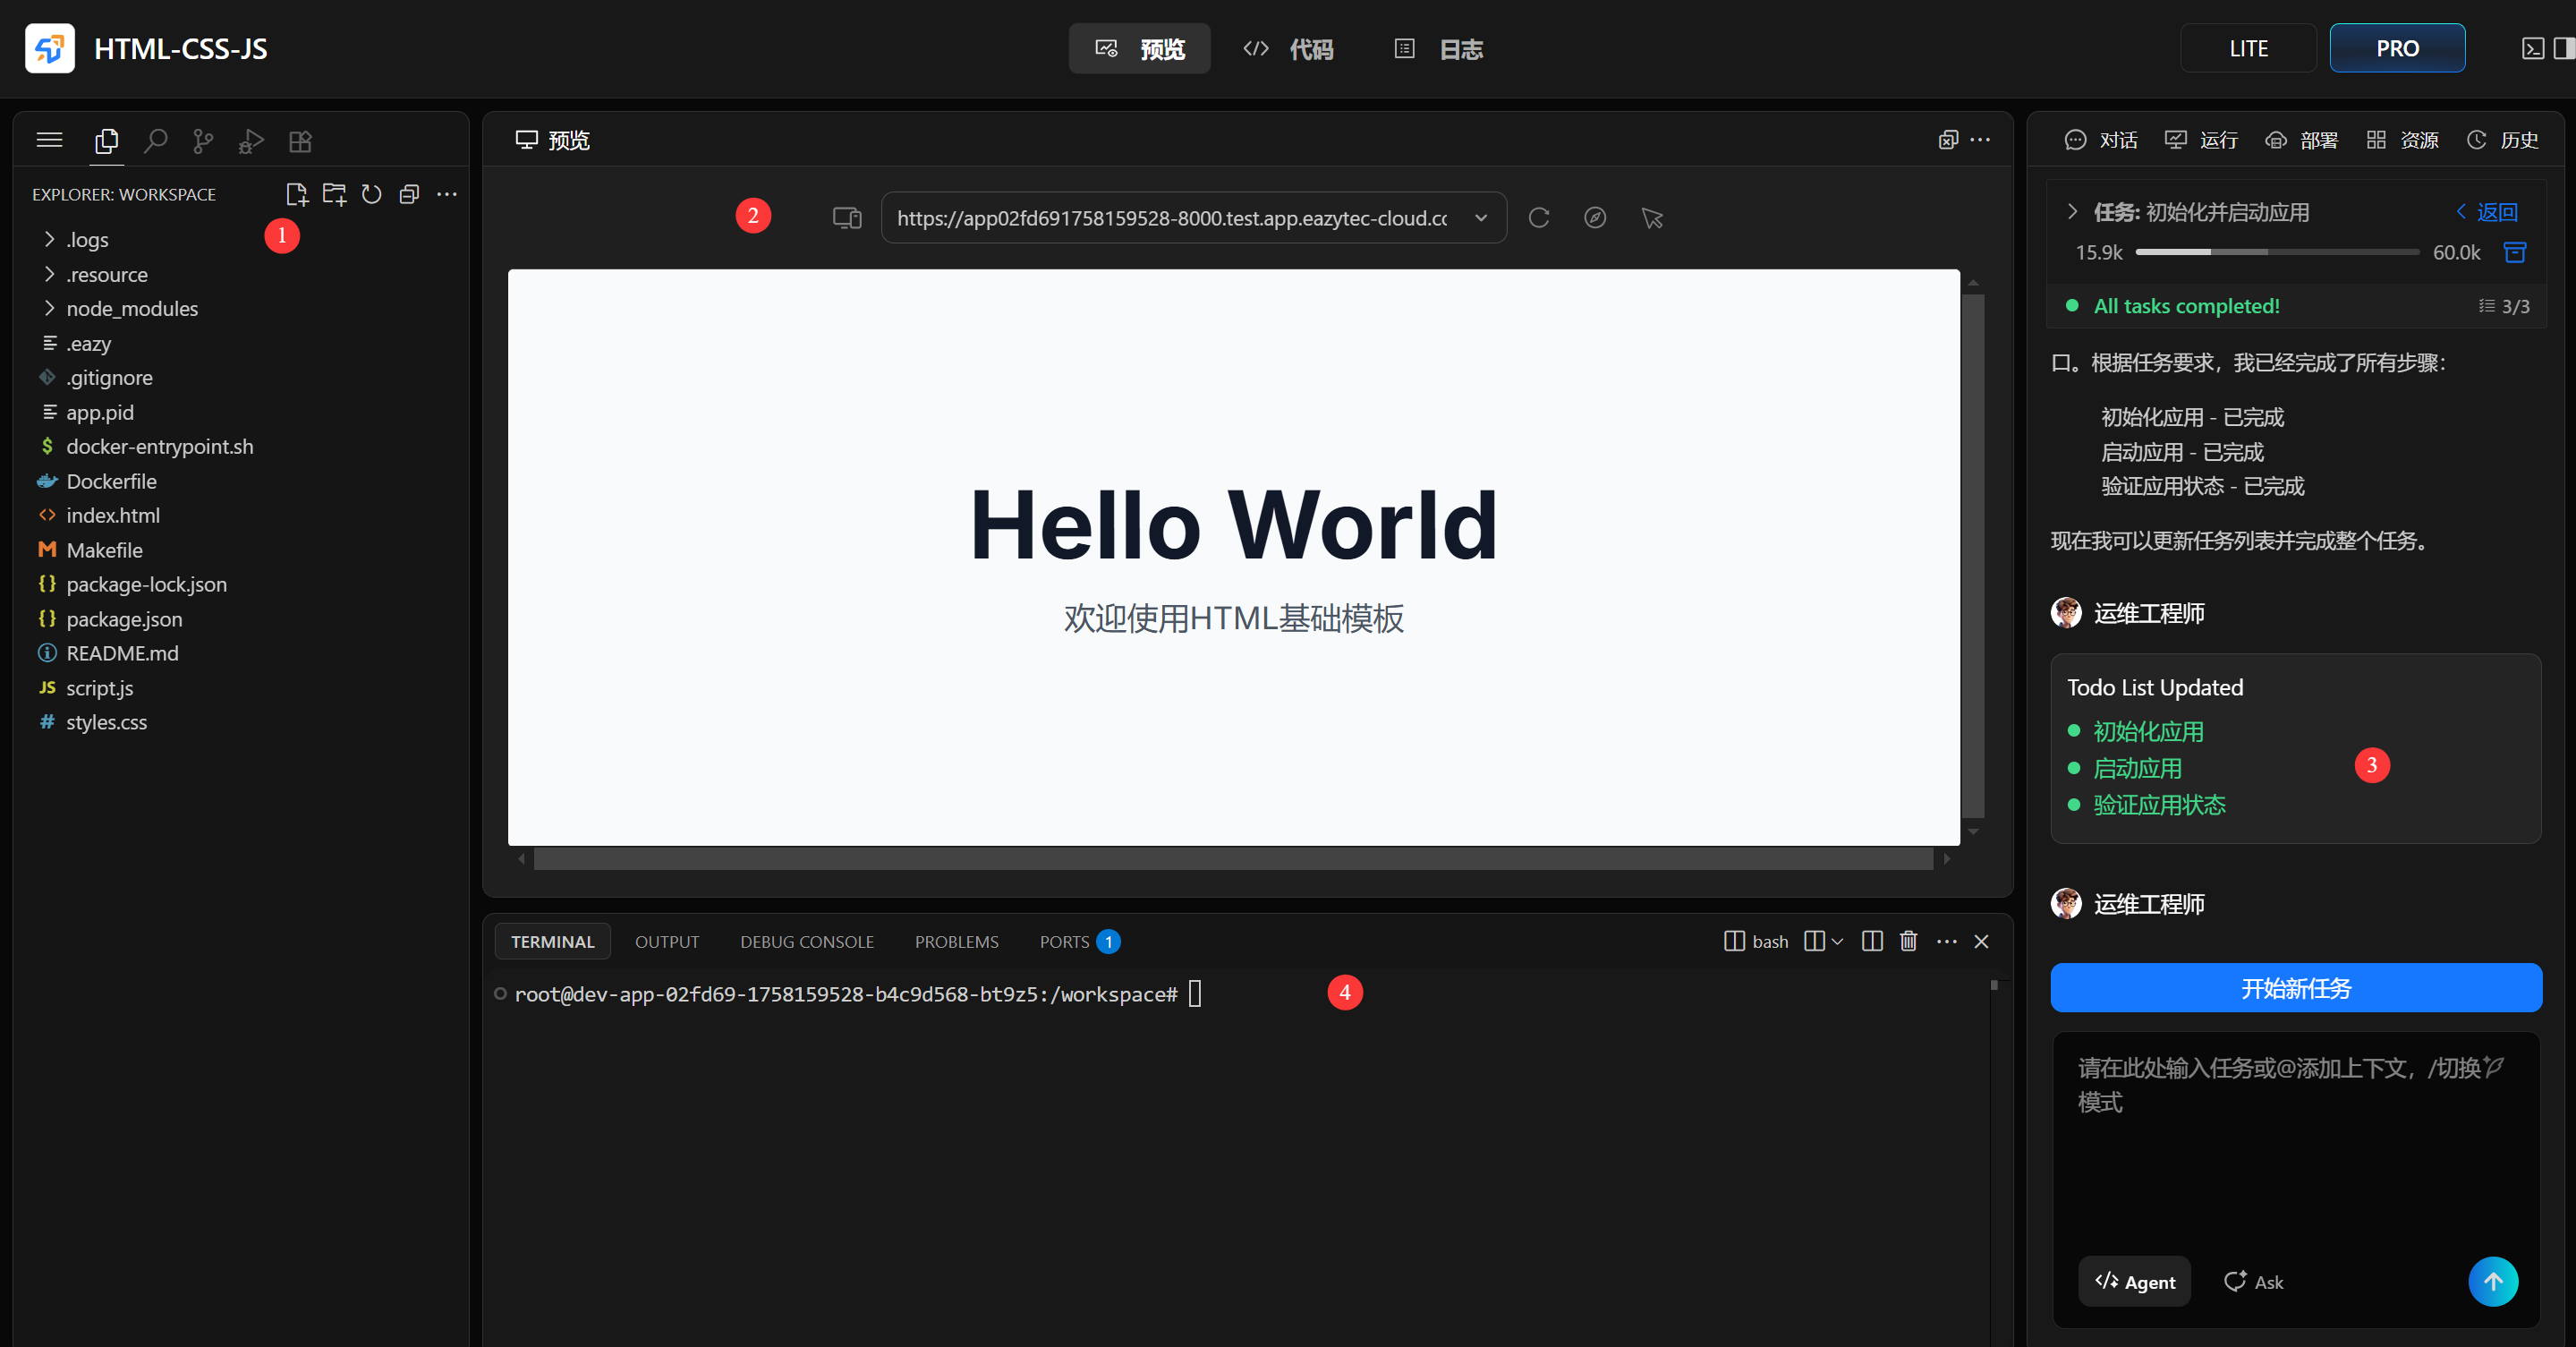
- Complete code directory for viewing code. Click to view code and modify directly.
- Preview/Code display area. Click to view code and modify directly in this area, then start code to view preview effects.
- Chat area. In Pro mode, you can still make simple detail modifications through chat.
- Code execution log display area. Shows logs during code execution, convenient for development engineers to view execution status in time and participate in code problem fixing.