
Cursor Integration Guide
Configure EazyDevelop models via the OpenAI protocol in Cursor by setting up custom model integration, enabling features such as code completion, code generation, debugging, and more.
Note: Only users with a Cursor Premium subscription or above can configure custom models.
1. Obtain API Key
- Refer to the Model Activation Help Documentation
2. Install Cursor
Visit the Cursor Official Website to download and install the version suitable for your operating system.
3. Create a Custom Model
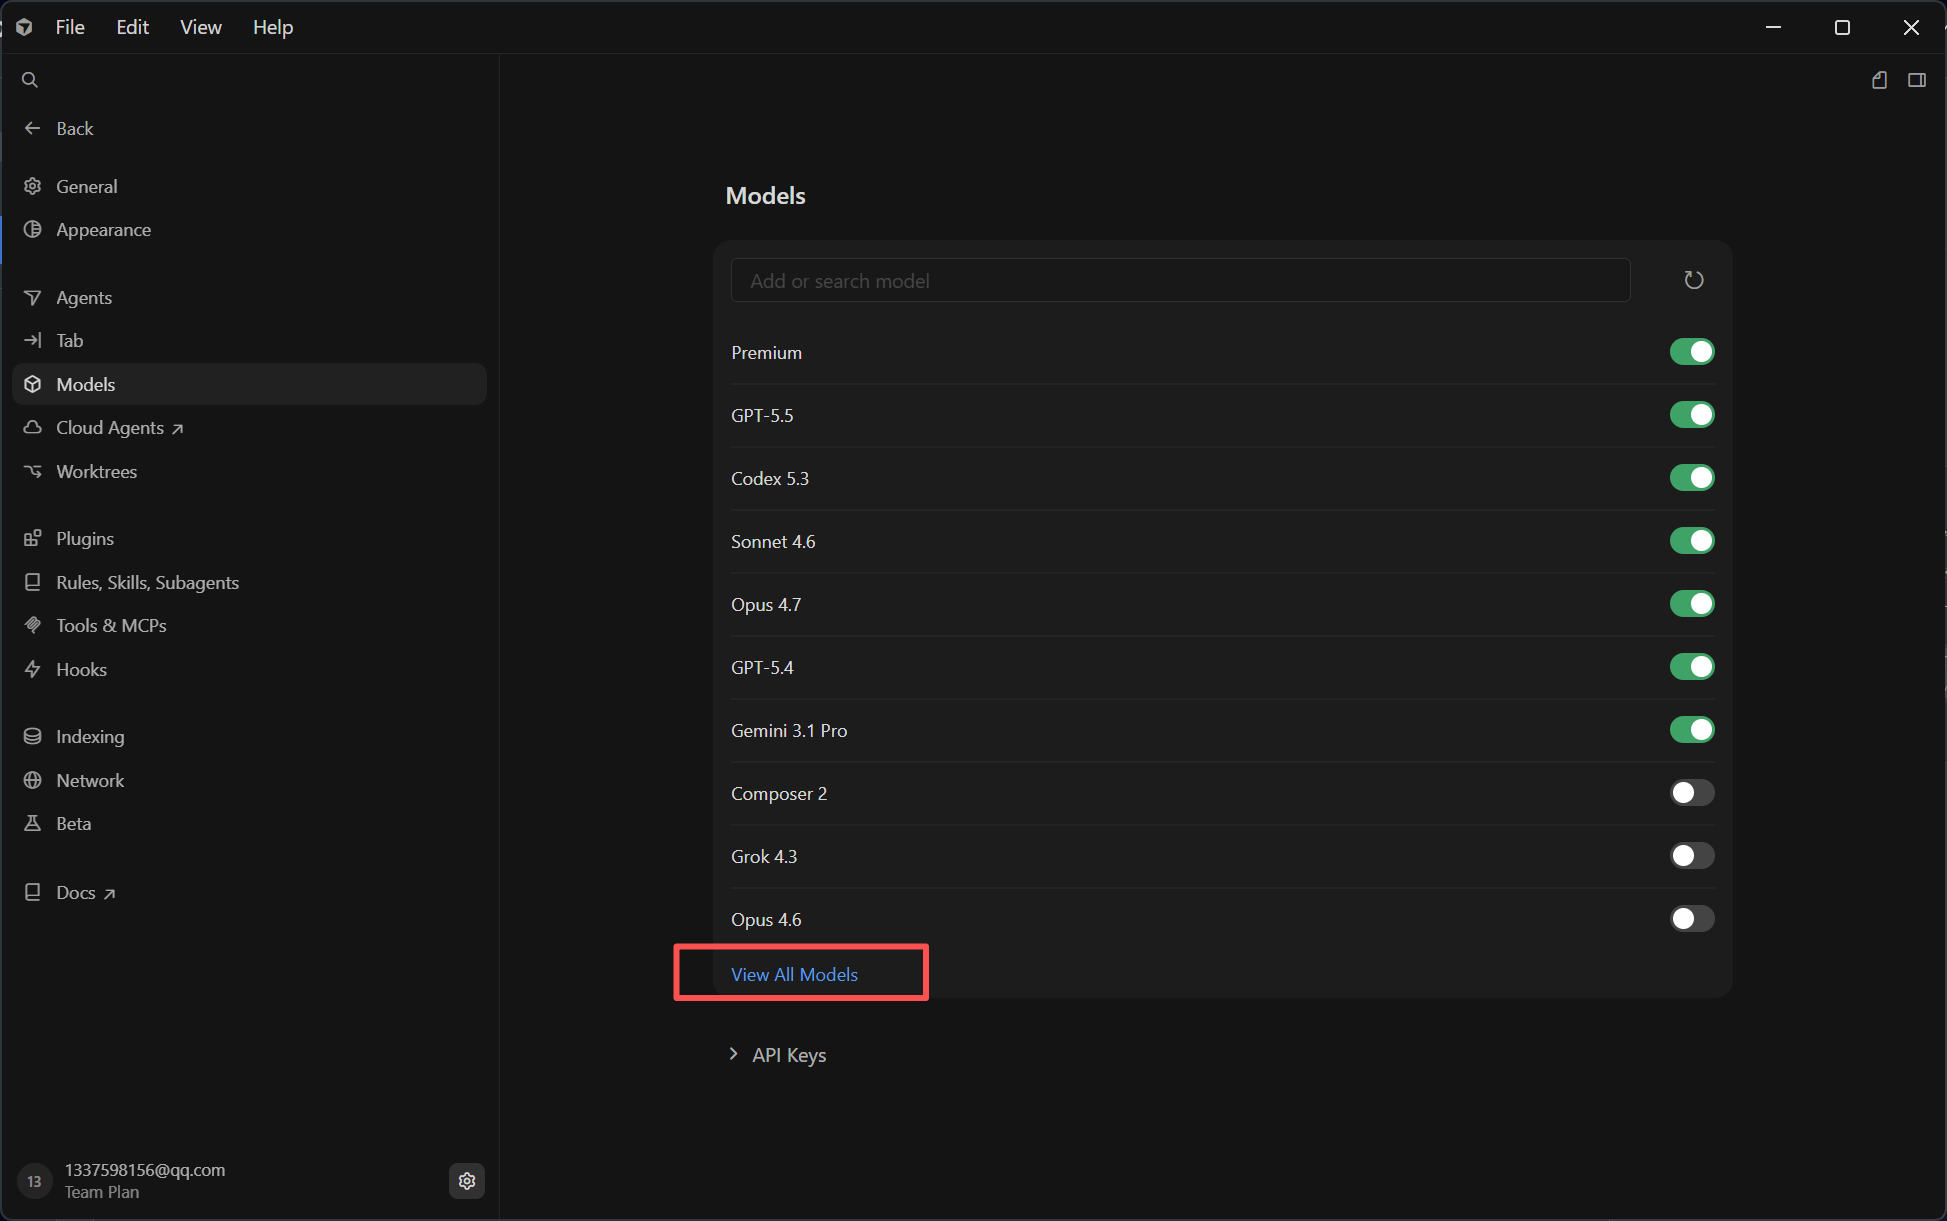
1: Open Models Settings
In Cursor, open the Models section, click View All Models, then click Add Custom Model.
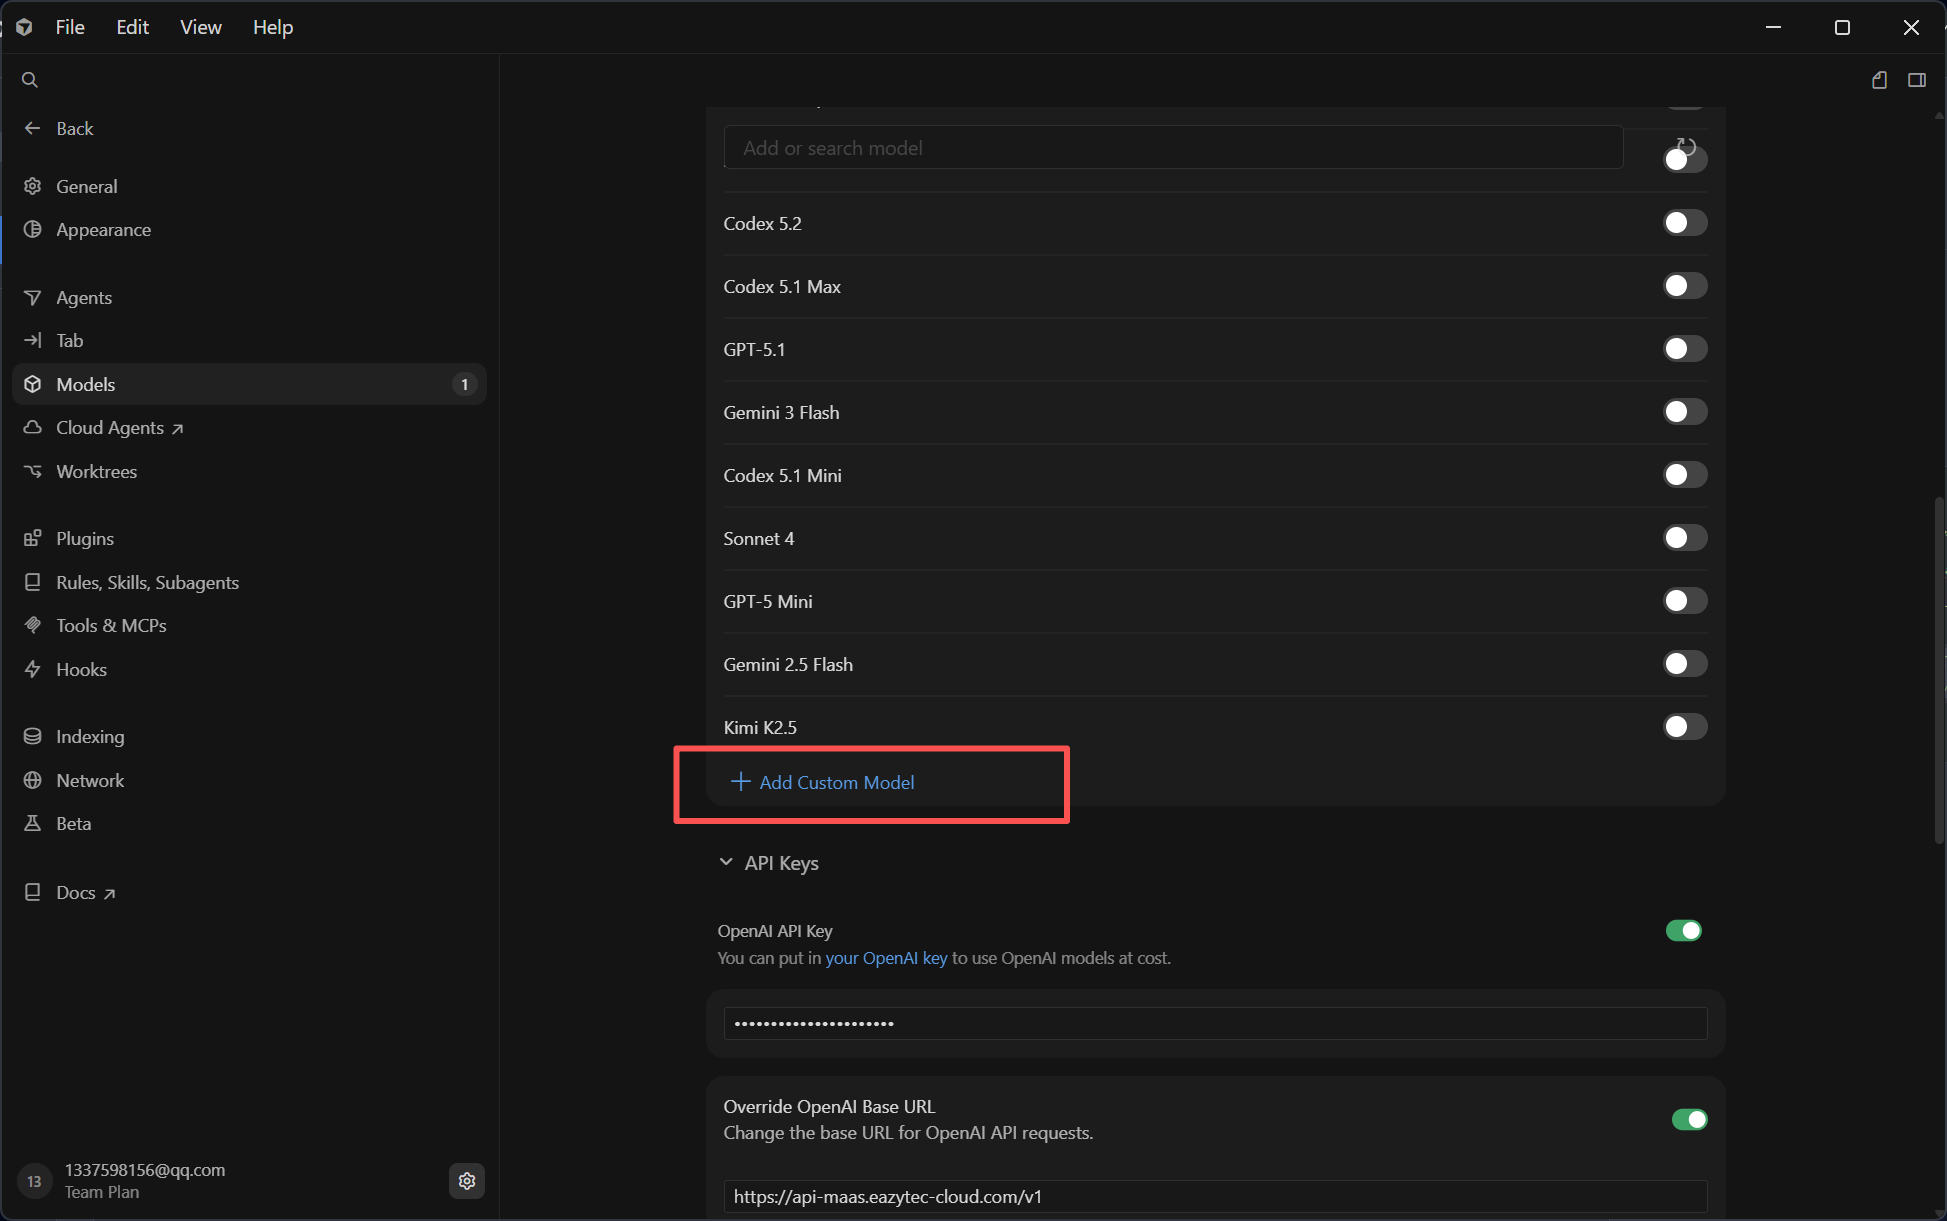
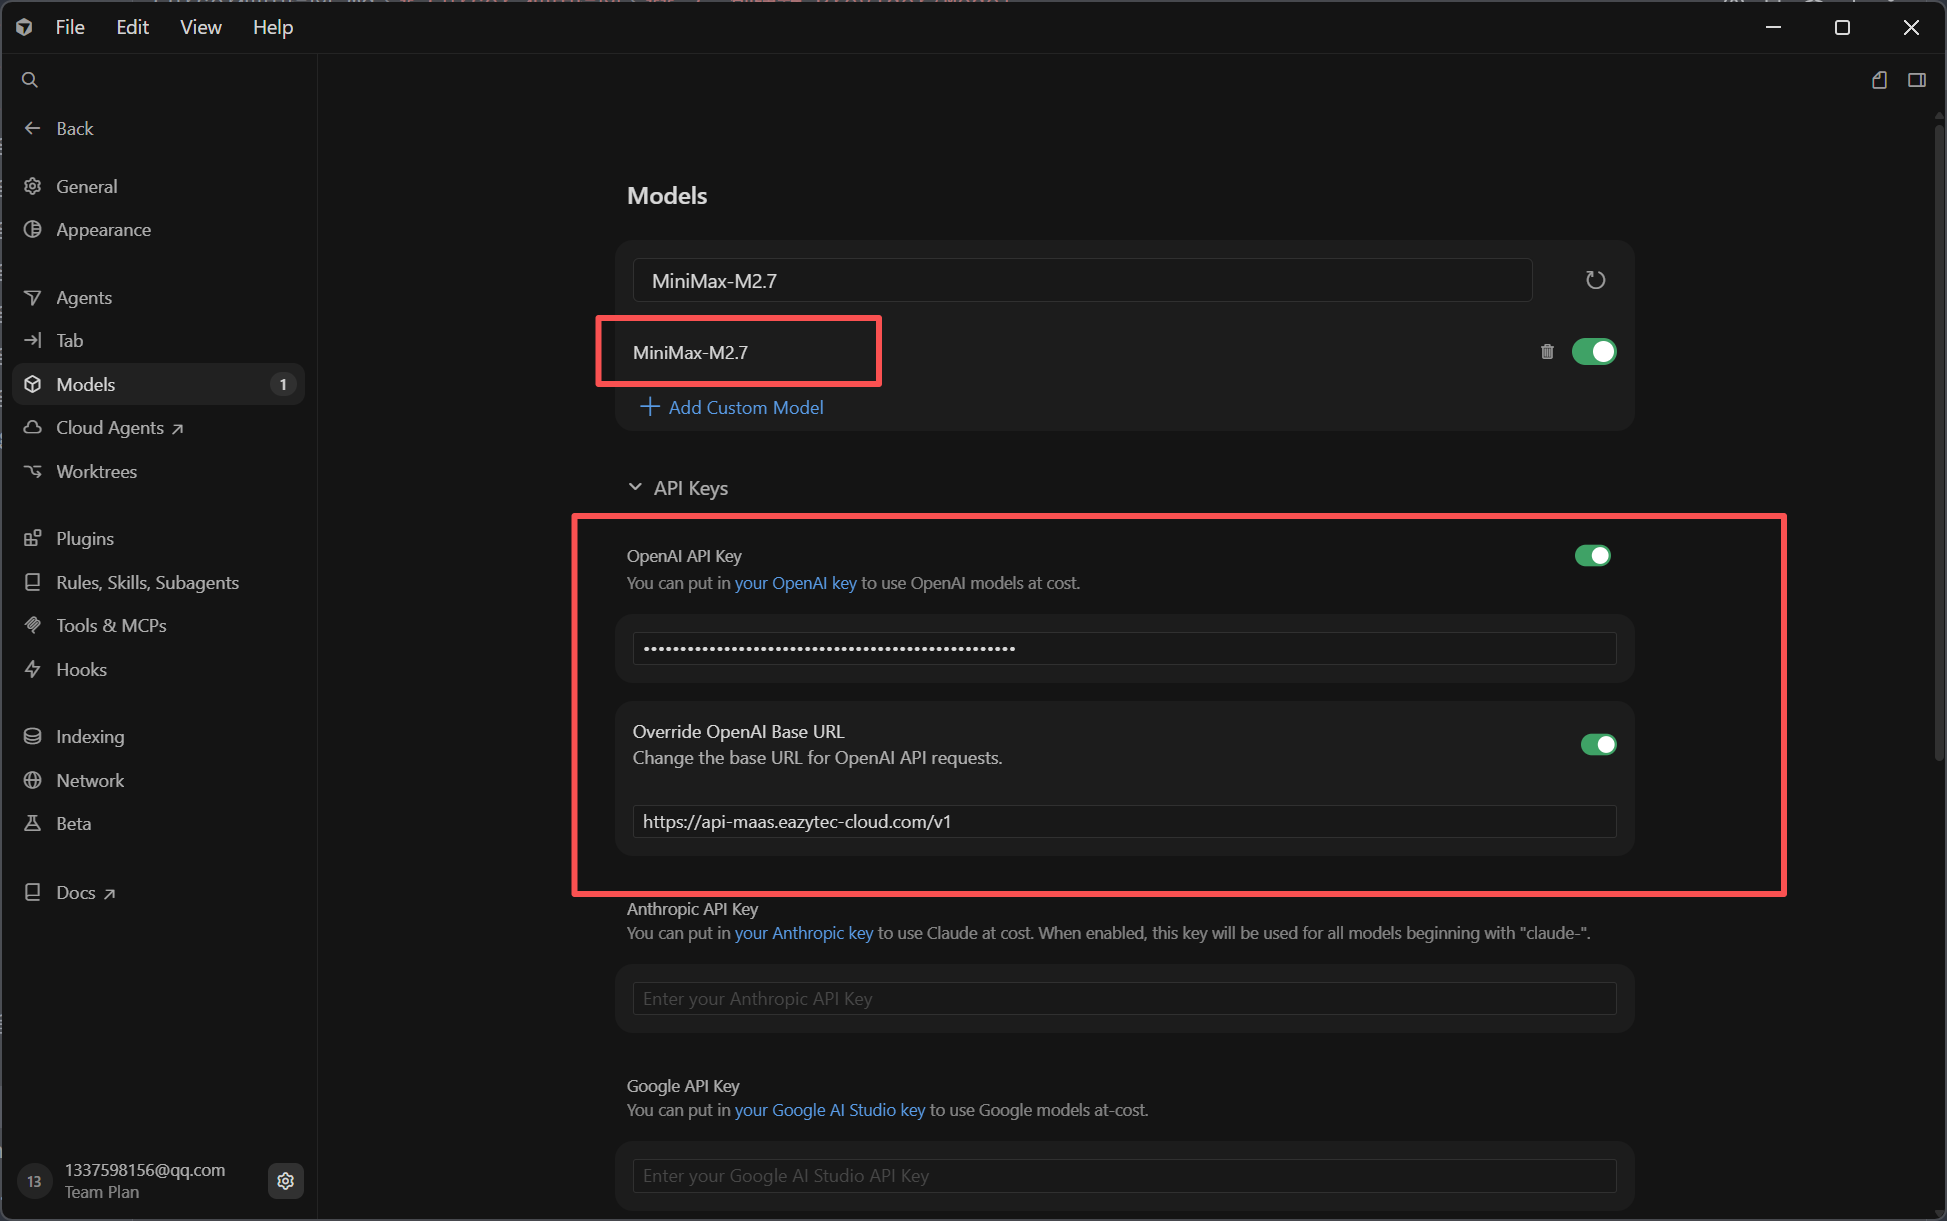
2: Configure Model Information
Select the OpenAI protocol and configure as follows:
| Configuration Item | Description |
|---|---|
| OpenAI API Key | Obtained from the EazyDevelop platform |
| Override OpenAI Base URL | Replace with https://api-maas.eazytec-cloud.com/v1 |
| Model Name | Enter the model name activated on EazyDevelop, such as MiniMax-M2.7 |
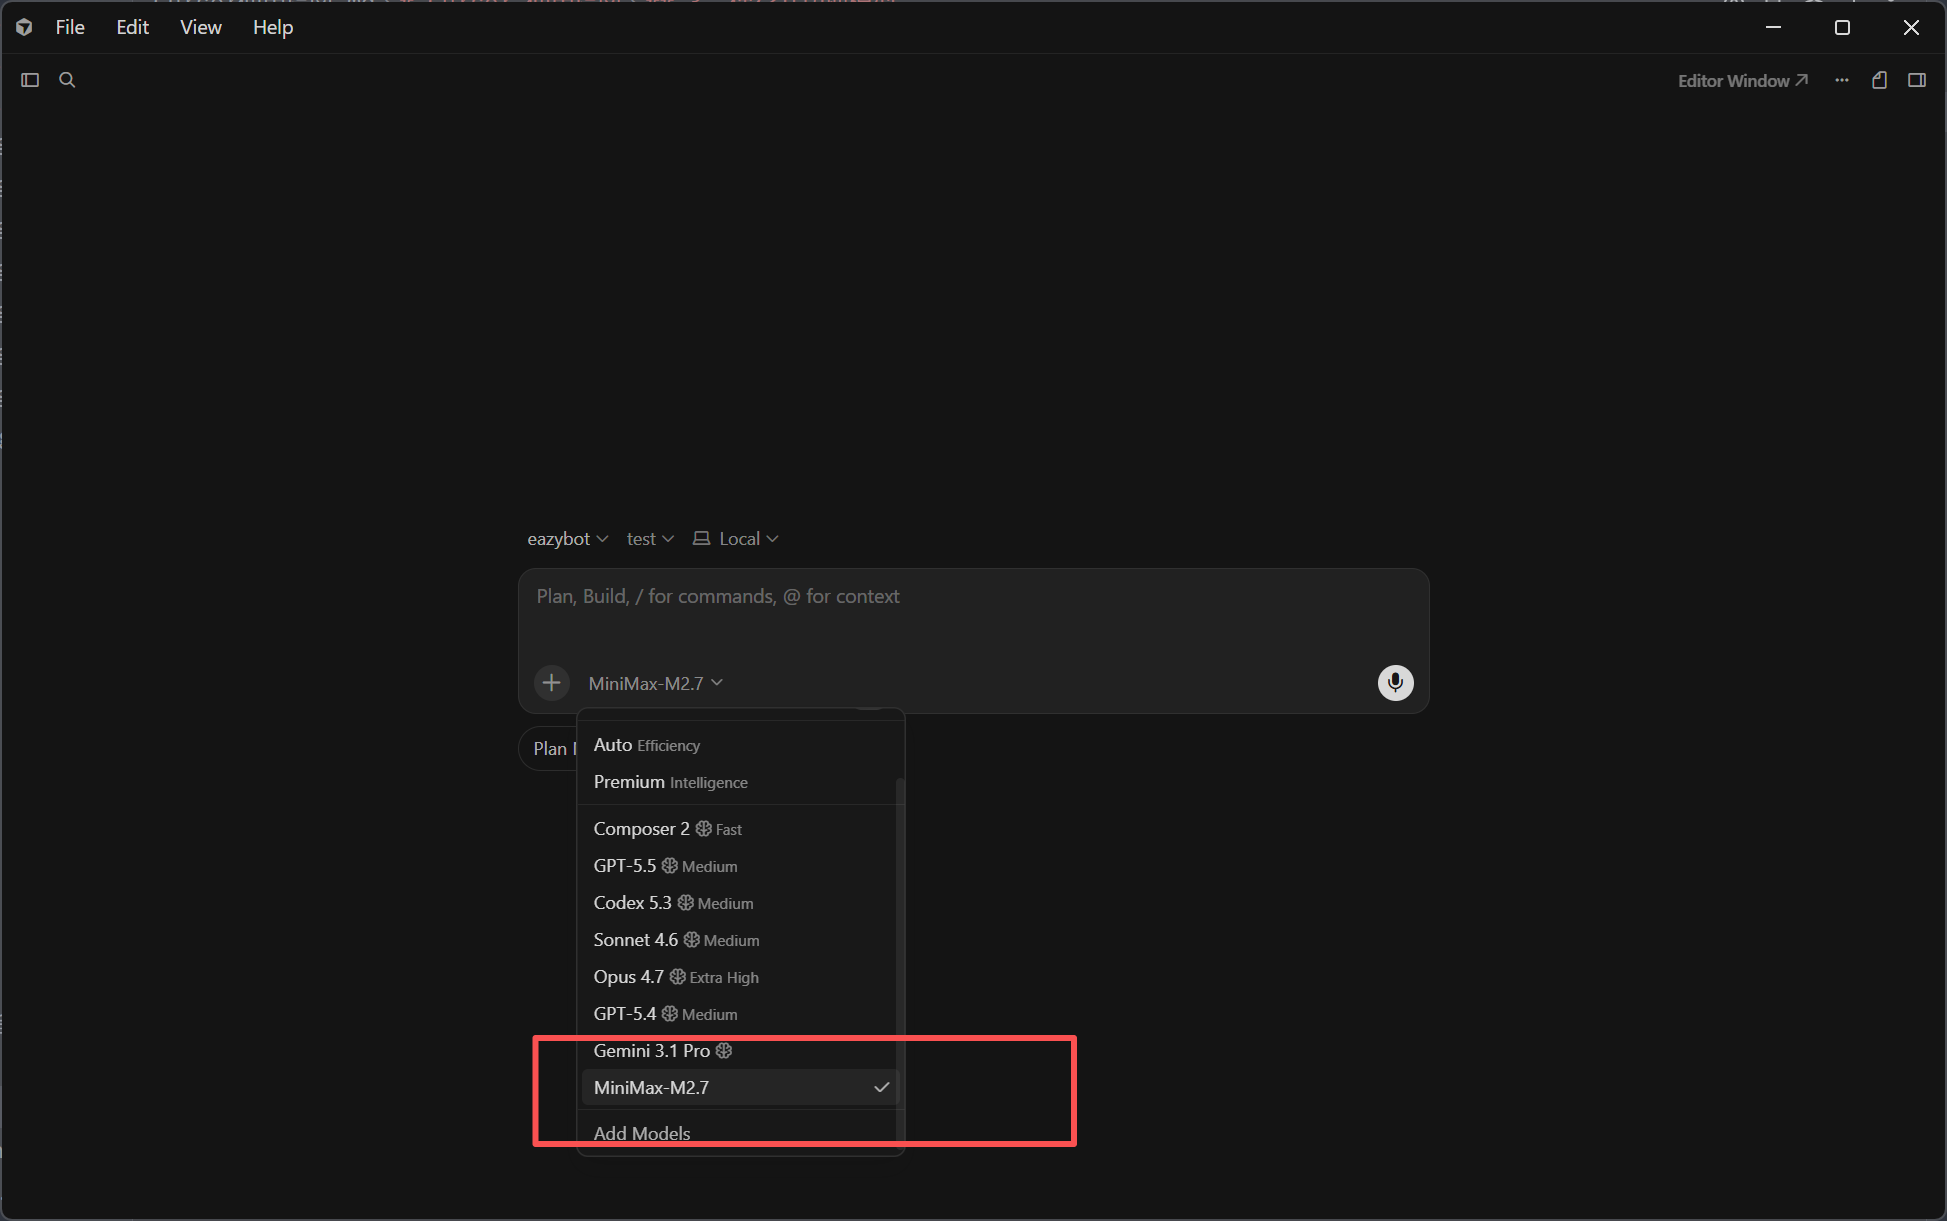
3: Save and Switch Model
After completing the configuration, save the settings and turn off Auto on the main page, then select the model you just created.
4. Start Using
After configuration, press
Ctrl+Shift+Lto open the AI chat panel and start using it.
With this setup, you can begin using the models provided by the EazyDevelop platform for code generation, debugging, task analysis, and more.
Important Notes
- Only Cursor Premium subscriptions and above support custom models; lower-tier users cannot use this feature
- If a model is unavailable, please check whether the API Key is valid and the model name is correct
- It is recommended to turn off Auto mode and manually select the configured custom model