
Cloud Agent
Cloud Agent is located under the Resources category in the console left navigation. It consolidates all resources from the former "Application Center" and "Project Center", uniformly managing all template-deployed AI applications and secondary development projects within the team. It provides full lifecycle management including resource monitoring, spec upgrade, storage expansion, start/stop, edit, and delete.
The top of the page is divided into two tabs: Applications and Projects. The two resource types are fully isolated—ready-to-use AI applications and code secondary development projects are managed separately.
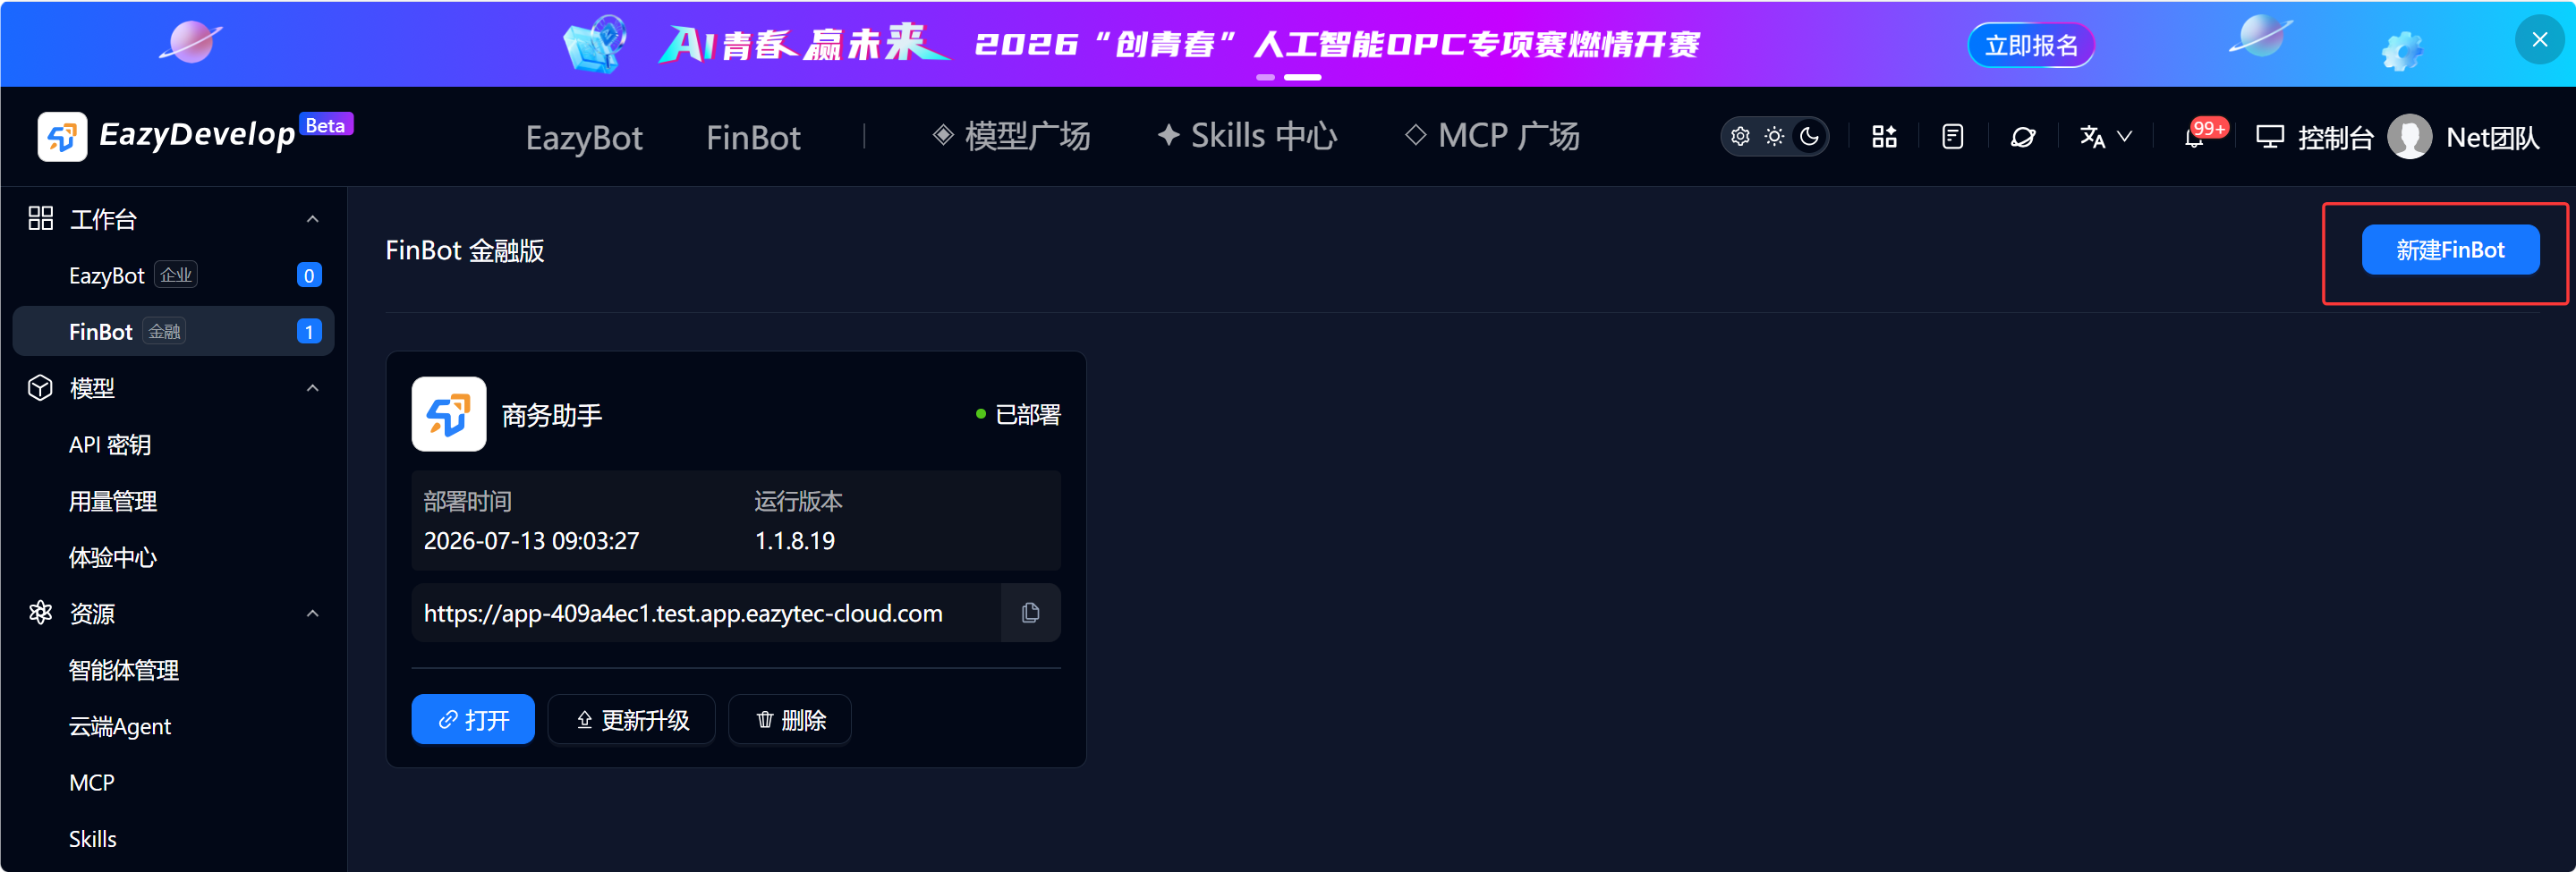
- Template center deployed applications: Applications one-click deployed from the platform template market are uniformly displayed in this category.
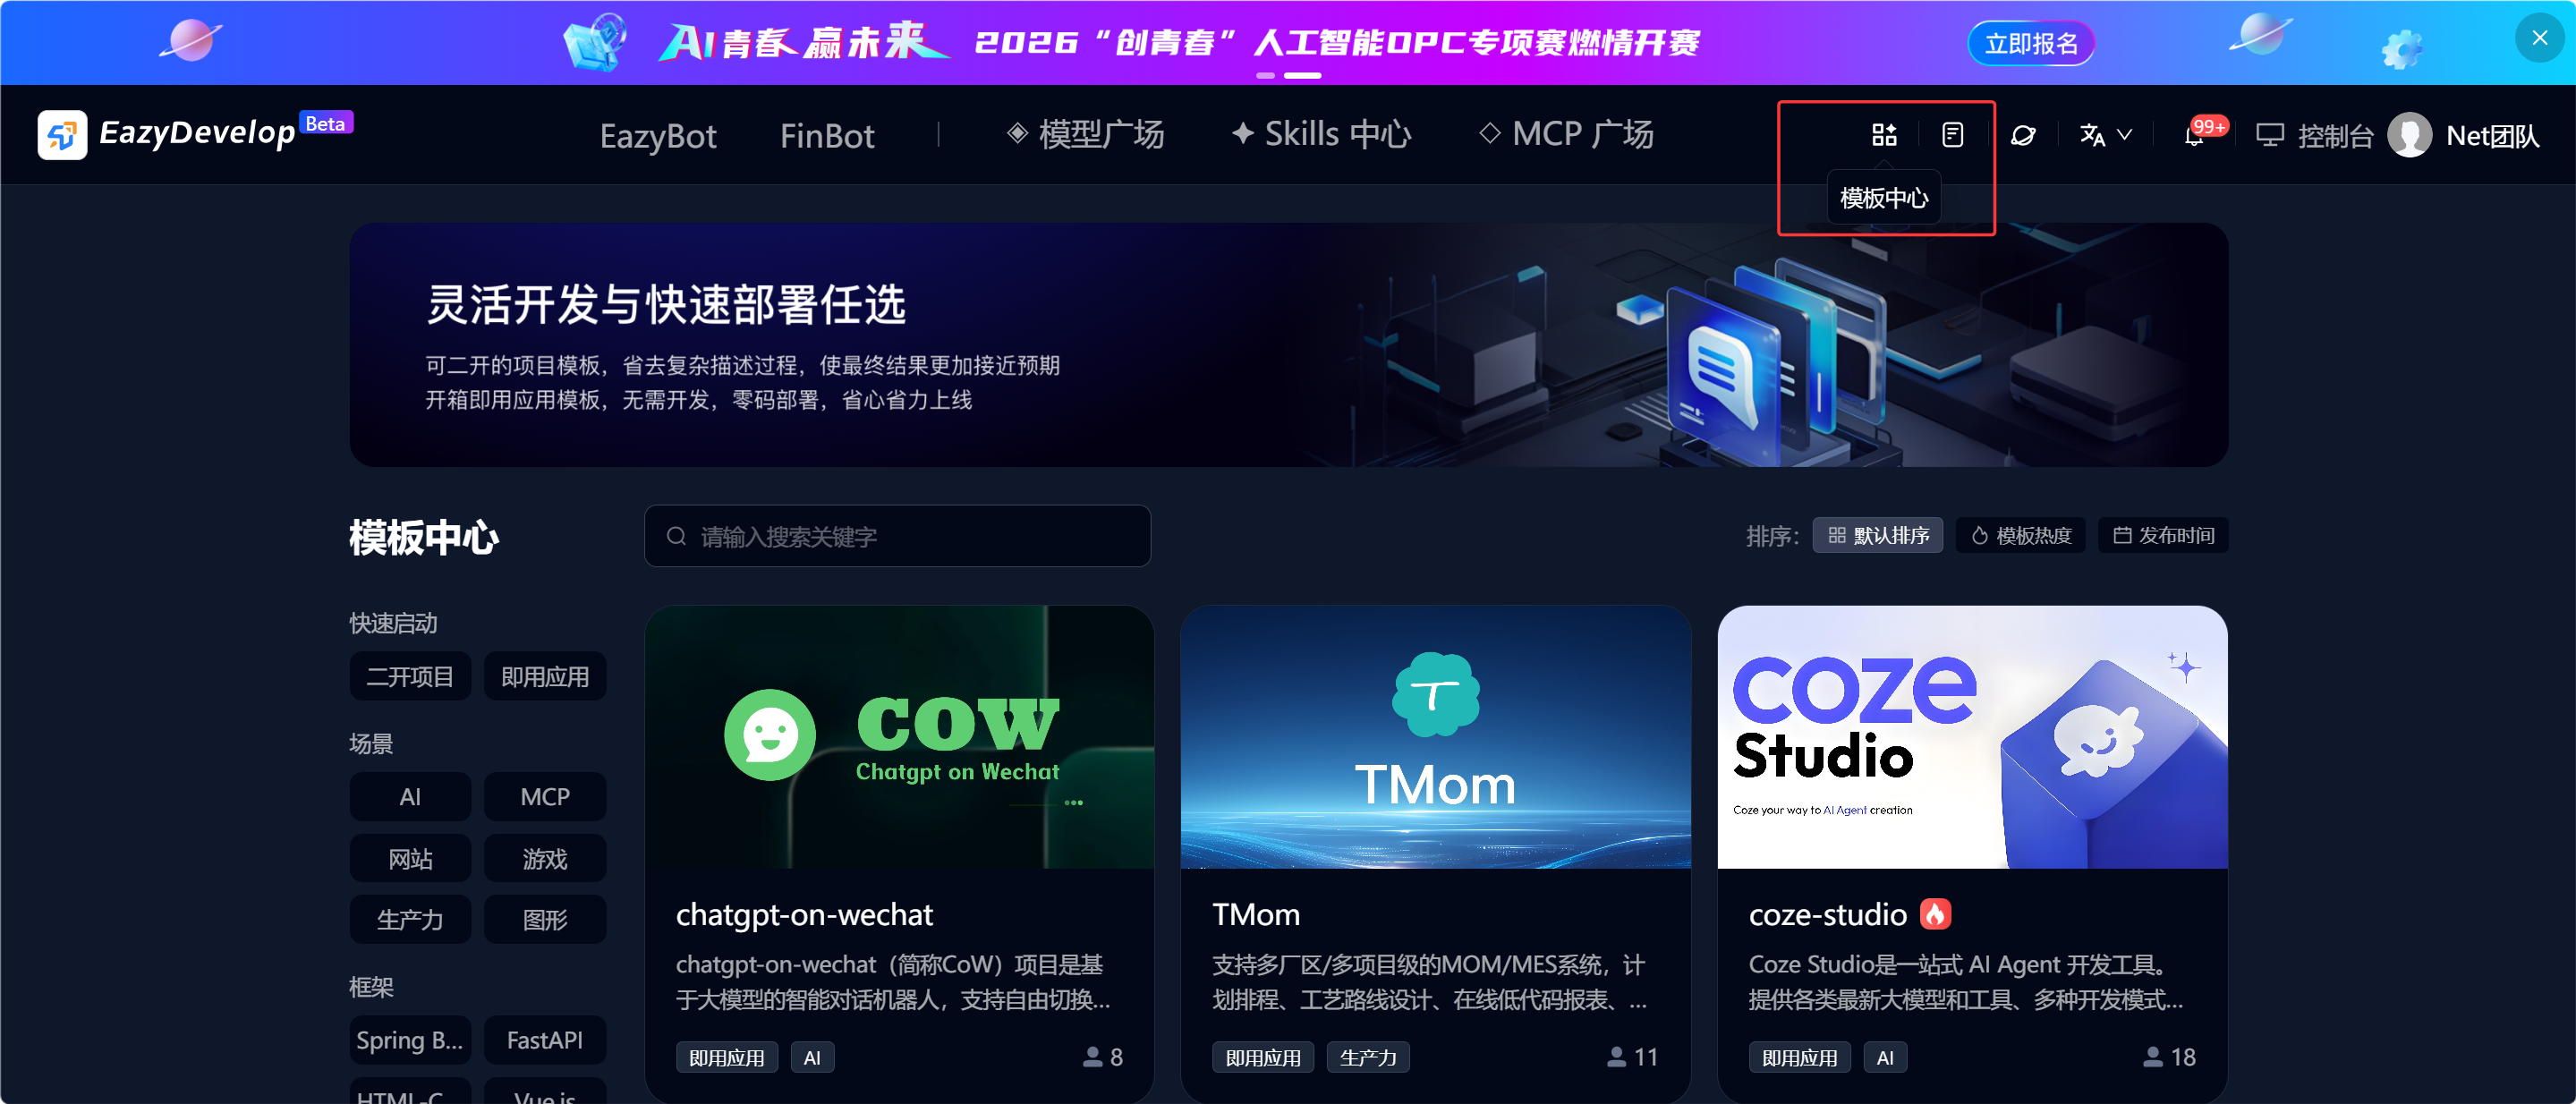
- Click the icon in the top-right corner to enter the Template Center, select a template, and click Deploy.

Basic Operations
- Edit: Click Edit to open a dialog and modify application / project name, description, and avatar. Supports png / jpg / gif image formats.
- Delete: Reuses the original application / project deletion logic.
- Click View to enter the resource details page, with two display styles: "Ready-to-use Application" and "Secondary Development Application".
- Click the icon in the top-right corner to enter the Template Center, select a template, and click Deploy.
Application Details Page (Ready-to-use AI application, EazyBot / FinBot / finished template deployment)
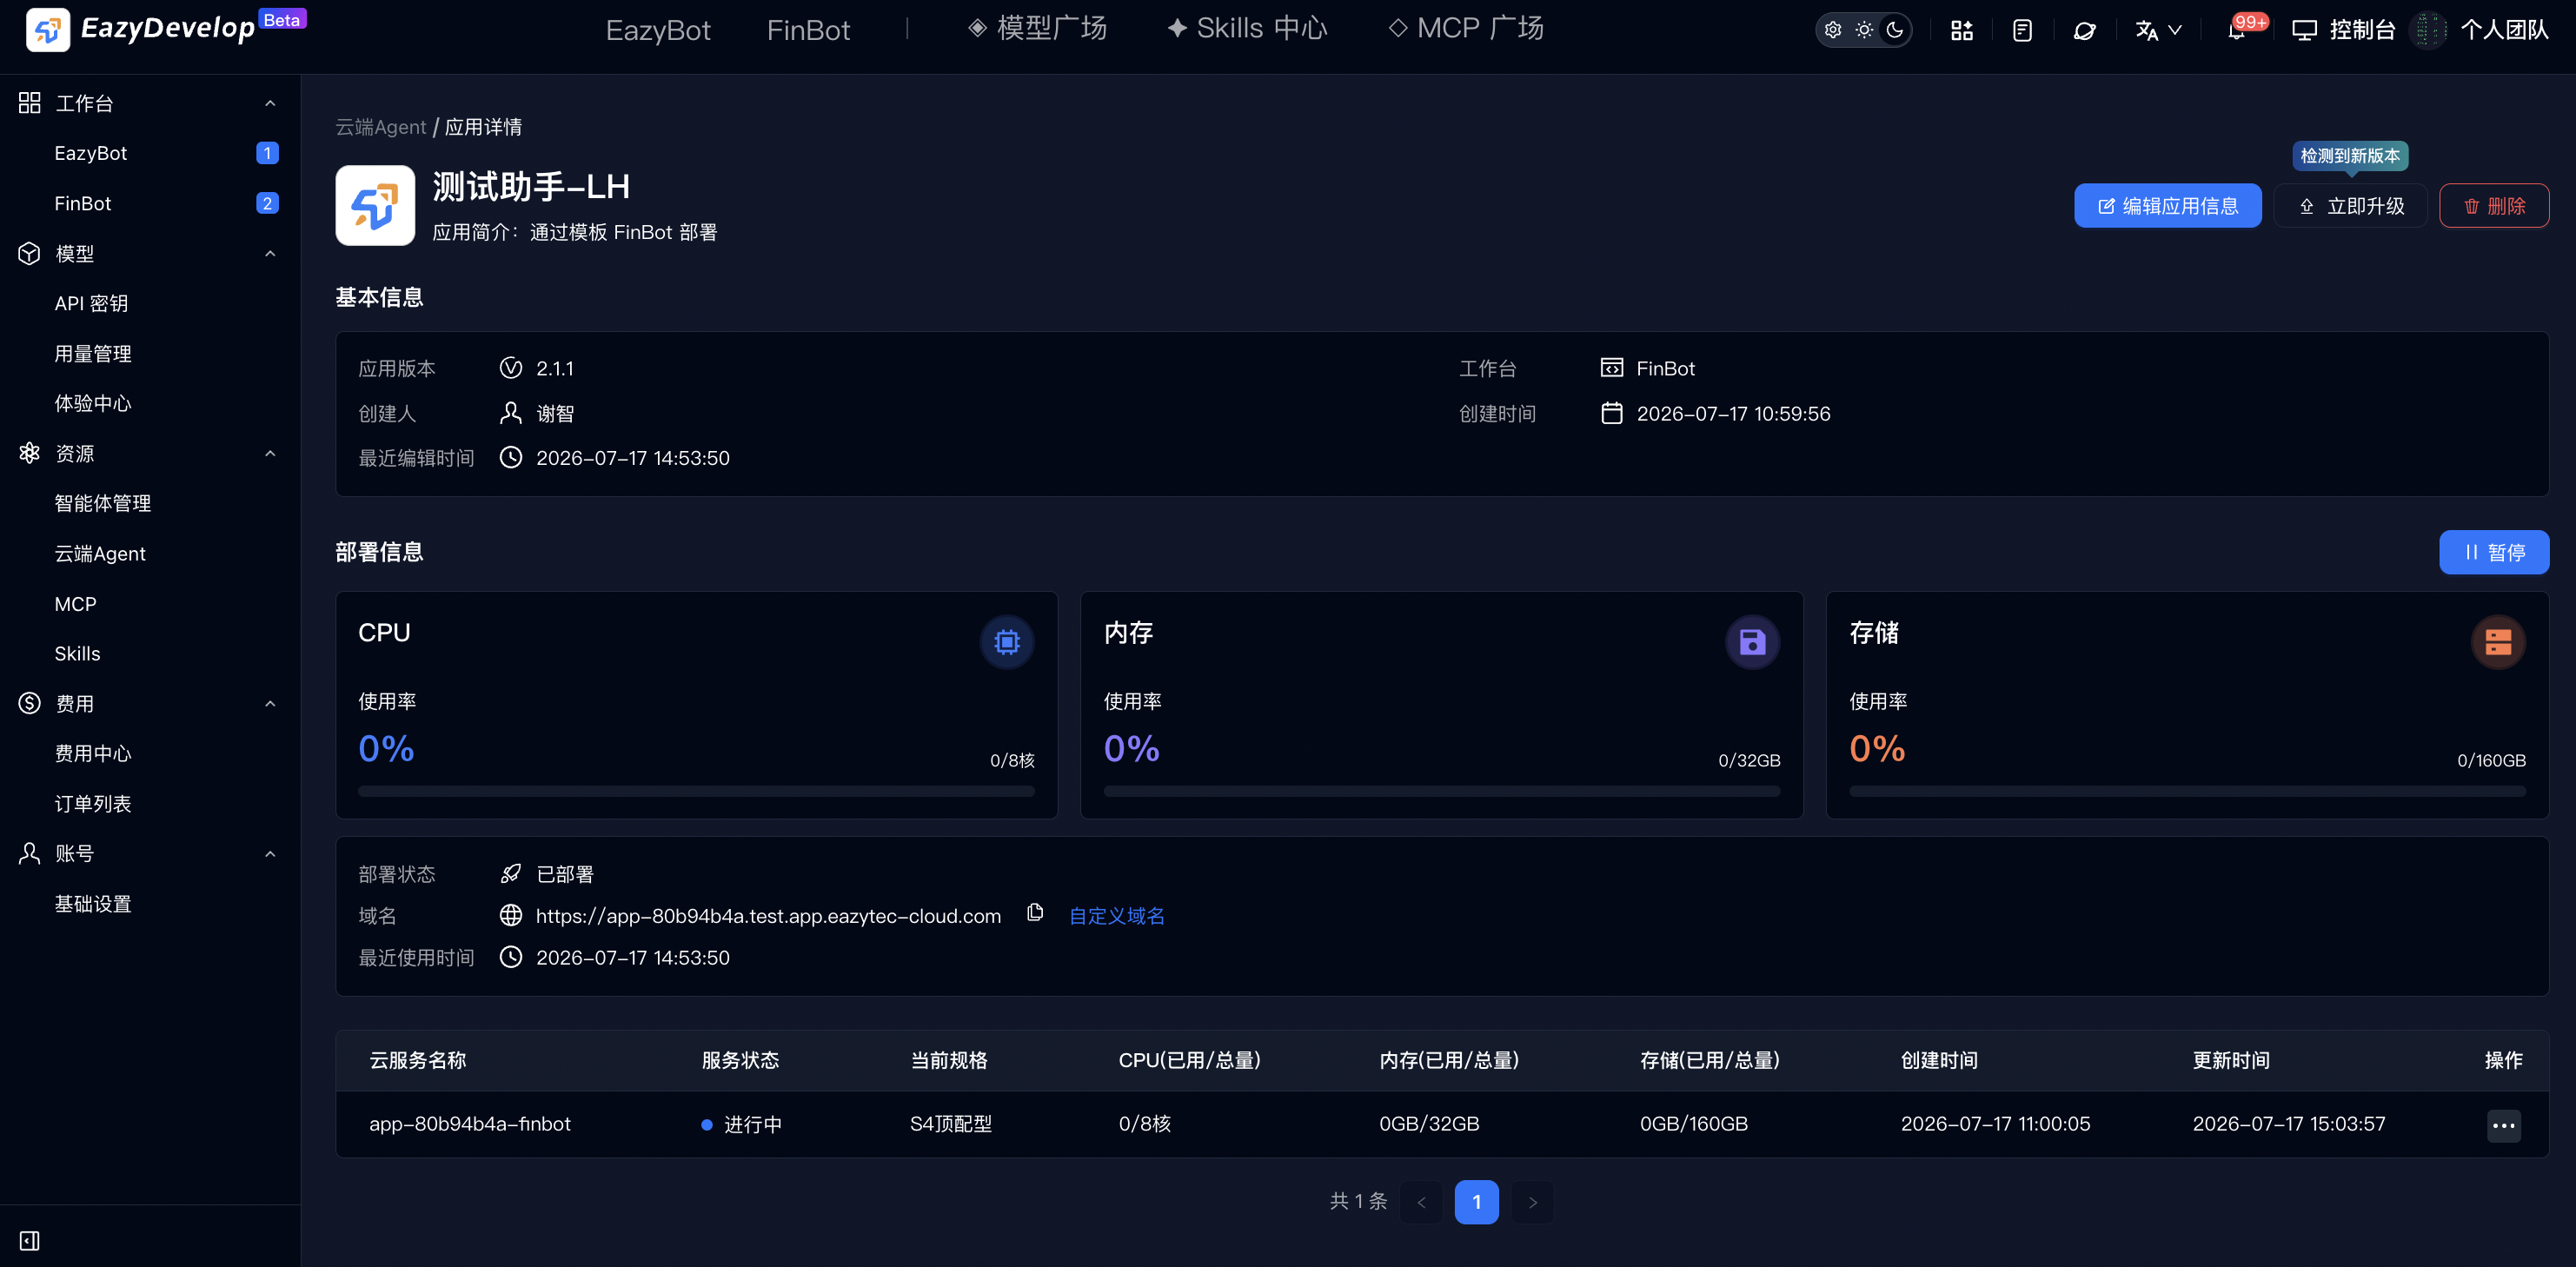
Top Action Bar
Fixed function buttons in the top-right corner:
- Edit application info: Same as list edit function—modify name, description, avatar.
- Upgrade now: Highlighted when a new template version is detected. One-click upgrade of the application's underlying template. Button hidden when no new version.
- Delete: Destroy the current application and release all cloud resources.
- Pause: Temporarily stop application cloud services. After pausing, users cannot access the domain; CPU / memory billing stops, storage data is retained.
Basic Information Section
Central display of application static basic data:
| Field | Description |
|---|---|
| Application version | Current deployed template version number; new version detection compares against this field |
| Creator | Team member account name who initiated deployment |
| Creation time | Full timestamp when application was first deployed |
| Last edited time | Timestamp of last application info modification or template upgrade (precise to seconds) |
| Workbench | Identifies whether the application belongs to EazyBot / FinBot / third-party template workbench |
Deployment Information Section (Core resource monitoring area)
Three horizontal visual monitoring cards for CPU, memory, and storage, showing real-time resource usage:
- CPU card: Usage rate (real-time load percentage); resource spec (used cores / total allocated cores).
- Memory card: Usage rate (program runtime memory load percentage); resource spec (used GB / total allocated GB).
- Storage card: Usage rate (disk read/write usage percentage); resource spec (used GB / total allocated GB).
Deployment status and access configuration:
- Deployment status: Shows Deployed / Paused / Deployment failed three states. When paused, upgrade and expansion buttons are grayed out and disabled.
- Domain: Platform auto-assigns a public access domain, supports click to copy link. Custom domain button on the right to bind enterprise-owned domain for external access.
- Last used time: Records the last time a user accessed the application via the domain.
Bottom Cloud Service List Table
Shows all running service instances under the current application. List fields: cloud service name, service status, current spec, CPU (used / total), memory (used / total), storage (used / total), creation time, update time, actions. Each service supports independent start/stop and restart operations.
Project Details Page (Secondary development project, template creation)
Layout Differences
Compared to ready-to-use applications, secondary development projects allow users to Edit in IDE—using a template as the base for secondary development as needed. Divided into four sections: basic information, development information, deployment information, and resource information.
Basic Information Section
| Field | Description |
|---|---|
| Project Git | Git repository address bound to the project, supports click to navigate to repository |
| Creation time | Time when project development environment was initialized |
| Creation method | Distinguishes From template and Import Git repository two sources |
| Template | Underlying development template name the project depends on |
| Last edited time | Timestamp of last project configuration modification or code push |
Development Information Section (Development environment resource monitoring)
- CPU / memory / storage monitoring card logic is identical to application details, showing real-time development environment resource load.
- Development status: Shows Initializing / Development ready / Running, with current progress step hints.
- Configuration: Shows the base hardware spec selected during project initialization.
- Domain: Not configured (secondary development projects require manual deployment to generate access address).
- Last used time: Last time logged into online development environment or pushed code.
Deployment Information Section
Service data is displayed only after the project completes code build and deployment. Undeployed state shows "No deployment information".
Resource Information Section
Shows summary of storage and compute resources independently occupied by the project. Before deployment completes, shows "No resource information".
Application Spec Upgrade (CPU / Memory Expansion)
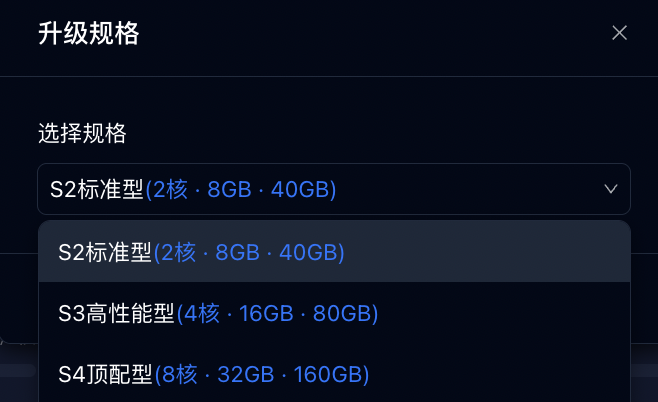
- Enter target application details and click the upgrade spec button.
- System automatically filters to show only hardware specs higher than current configuration. Lower specs are not selectable.
- Pre-check: If team plan CPU / memory remaining quota is insufficient, dialog navigates to Billing Center to upgrade plan. Upgrade button is grayed out when application is paused or expired.
- After confirming upgrade, backend reschedules services and updates total resources. Total storage formula: base spec storage + historical expansion storage.

Standalone Storage Expansion
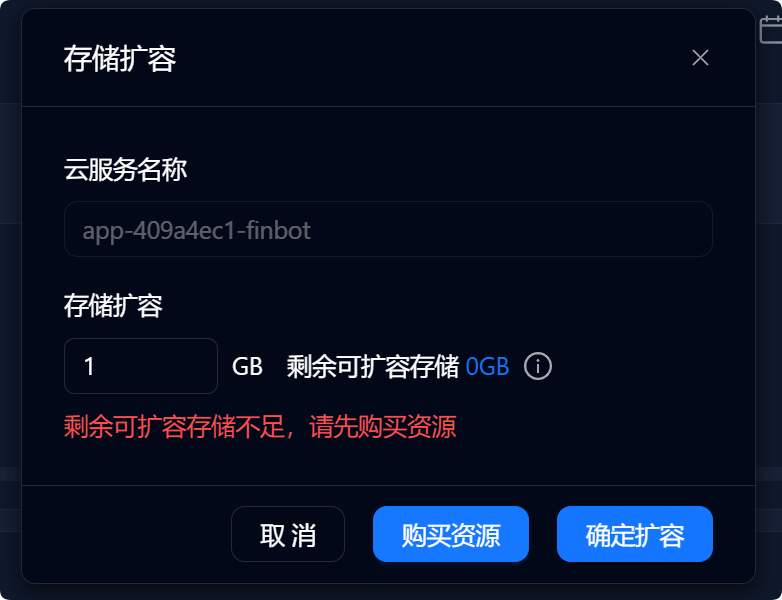
- Click the expansion icon in the top-right corner of the storage card to open the expansion dialog.
- Two storage quota rules:
- Plan-included base storage: Can only be expanded through spec upgrade, cannot be added separately.
- Standalone expansion storage pack: Enter expansion GB value to directly add disk capacity.
- When remaining expandable quota is insufficient, dialog navigates to dedicated storage purchase page showing only storage resource packs, hiding CPU and memory purchase options. After payment, return to dialog to refresh remaining quota.
Application Pause / Resume
- Click the Pause button in the top-right corner of details to stop online service. External domain becomes inaccessible.
- In paused state, compute resources are released and stop consuming quota. Disk storage data is permanently retained.
- After pausing, the button changes to Resume. Click to restart service and restore external access.
Custom domain configuration:
- Click Custom domain in the deployment information section.
- Enter enterprise-owned domain and complete DNS resolution verification per instructions.
- After verification passes, access the current AI application via your own domain instead of the platform default test domain.
Template Version Upgrade
- When the application detects a new version, a blue Upgrade now button appears in the top-right corner.
- Click to automatically pull latest template code; backend rebuilds and redeploys.
- After upgrade completes, application version number syncs. Original configuration and conversation data are retained.
General Page Constraints
- Resource isolation: Application and Project tab data are fully independent, never showing each other's resources.
- Resource deduction logic: CPU, memory: application / project running continuously occupies plan quota; released after pause. Storage: regardless of start/stop, base storage + expansion storage permanently occupies team quota; fully released after resource deletion.
- Legacy restrictions: Old resources created from deprecated knowledge base or database templates show a dialog on details page: "Resource delisted, application unavailable". Cannot perform upgrade or restart operations.
- Data persistence: After deleting Cloud Agent, all service logs, business files, and configuration data are permanently cleared and cannot be recovered.